Toyota Sienna Service Manual: Removal
1. REMOVE REAR DOOR SCUFF PLATE
2. REMOVE REAR DOOR WEATHERSTRIP
3. REMOVE BACK DOOR WEATHERSTRIP
4. REMOVE BACK DOOR SCUFF PLATE
5. REMOVE FRONT QUARTER TRIM PANEL ASSEMBLY
- Remove the floor anchor cover.
- Remove the bolt and disconnect the No. 2 rear seat outer belt assembly on the floor anchor side.
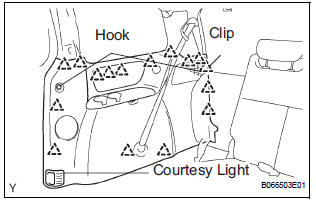
- Remove the 2 package holder net hooks.
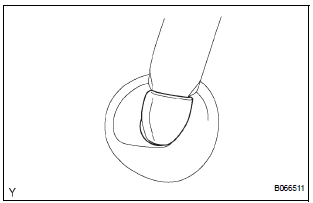
- Using a screwdriver, disengage the claw and remove the courtesy light.
- Disconnect the courtesy light connectors.
- Using a screwdriver, disengage the 16 clips and remove the quarter trim panel assembly.
HINT: Tape the screwdriver tip before use.
6. REMOVE REAR WINDOW SIDE GARNISH ASSEMBLY (0)
7. REMOVE NO. 1 REAR SEAT OUTER BELT ASSEMBLY (for 7-Passenger)
HINT: Refer to the instructions for disassembly of the rear No. 1 seat assembly (for captain seat type).
- Remove the rear seatback board RH.
- Remove the rear seat shoulder belt cover.
- Remove the bolt, nut and No. 1 rear seat outer belt assembly.
8. REMOVE 3 POINT TYPE REAR SEAT BELT ASSEMBLY (for 8-Passenger)
- Remove the nut and disconnect the 3 point type rear seat belt on the shoulder anchor side.
9. REMOVE NO. 2 REAR SEAT OUTER BELT ASSEMBLY
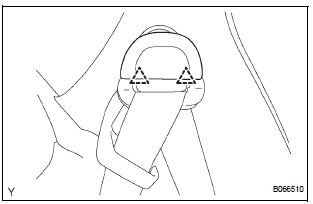
- Using a screwdriver, disengage the 2 claws and
remove the cover of the No. 2 rear seat outer belt
assembly on the shoulder anchor side.
HINT: Tape the screwdriver tip before use.
- Remove the bolt and disconnect the No. 2 rear seat outer belt assembly on the shoulder anchor side.
- Remove the bolt on the retractor side and remove the No. 2 rear seat outer belt assembly.
 Rear seat outer belt assembly
COMPONENTS
...
 Installation
1. INSTALL NO. 2 REAR SEAT OUTER BELT ASSEMBLY
NOTICE:
Do not disassemble the retractor.
Check the degree of tilt when the No. 2 rear seat
outer belt assembly begins to lock the ELR. ...
Other materials:
On-vehicle inspection
1. CHECK VVT SENSOR OUTPUT VOLTAGE
Turn the ignition switch to the ON position.
Check the voltage between the specified terminal
and body ground.
Standard voltage
While turning the crankshaft pulley by hand,
measure the voltage between each terminal. Check
that the voltage ...
Reassembly
NOTICE:
Before installation, coat the parts indicated by arrows
with power steering fluid (See page PS-7).
1. INSTALL VANE PUMP HOUSING OIL SEAL
(a) Coat a new vane pump housing oil seal lip with
power steering fluid.
(b) Using SST and a press, install the vane pump
housing oil seal until i ...
Touch Panel Switch does not Function
INSPECTION PROCEDURE
1 CHECK TOUCH PANEL
Check for foreign matter on the display.
OK:
The display is clean
2 CHECK TOUCH SWITCH (DISPLAY CHECK MODE)
Enter the "Display Check" mode (Touch Switch Check).
Touch the display in the area where the switch
malfunction o ...
