Toyota Sienna 2010-2026 Owners Manual: Active head restraints
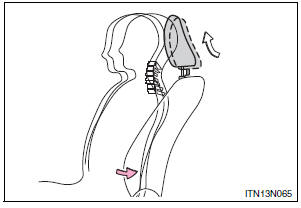
When the occupant’s lower back presses against the seatback during a rear-end collision, the head restraint moves slightly forward and upward to help reduce the risk of whiplash on the seat occupant
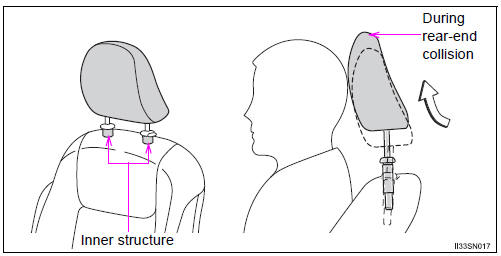
Active head restraints
Even small forces applied to the seatback may cause the head restraint to move. When a locked head restraint is pushed up forcibly, the head restraint inner structure may appear. This does not indicate a problem.
| WARNING When adjusting the seat position
Seat adjustment
|
 Adjustment procedure
Manual seat
Seat position adjustment lever
Seatback angle adjustment lever
Vertical height adjustment lever (driver’s side only)
Lumbar support adjustment switch (driver’s side ...
 Rear seats
...
Other materials:
Installation
1. INSTALL HEATED OXYGEN SENSOR (for Bank 2
Sensor 2)
(a) Using SST, install the heated oxygen sensor to the
front exhaust pipe.
SST 09224-00010
Torque: 40 N*m (408 kgf*cm, 30 ft.*lbf) for use
with SST
44 N*m (449 kgf*cm, 32 ft.*lbf) for use
without SST
HINT:
Use a torque wrench wit ...
Disposal
HINT:
Use the same procedures for the RH side and LH side.
The procedures listed below are for the LH side.
When scrapping a vehicle equipped with the SRS or
disposing of the front seat side airbag assembly, be sure to
deploy the airbag first in accordance with the proc ...
TRAC OFF Indicator Light Remains ON
DESCRIPTION
The skid control ECU is connected to the combination meter via CAN and
multiplex communications.
When the traction OFF switch is turned on, the TRAC OFF indicator light will
come on (for 2WD model).
WIRING DIAGRAM
INSPECTION PROCEDURE
NOTICE:
When replacing the brake actu ...
