Toyota Sienna 2010-2024 Owners Manual: Before driving
Floor mat
Use only floor mats designed specifically for vehicles of the same model and model year as your vehicle. Fix them securely in place onto the carpet.
- Insert the retaining hooks (clips) into the floor mat eyelets.
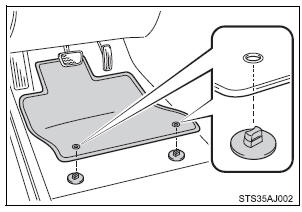
- Turn the upper knob of each retaining hook (clip) to secure the floor mats in place.
*: Always align the  marks.
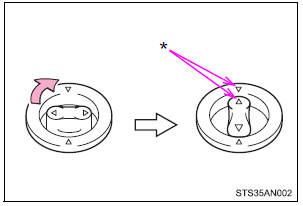
The shape of the retaining hooks (clips) may differ from that shown in the illustration.
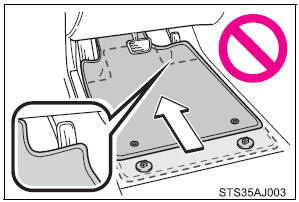
| WARNING Observe the following precautions. Failure to do so may cause the driver’s floor mat to slip, possibly interfering with the pedals while driving. An unexpectedly high speed may result or it may become difficult to stop the vehicle. This could lead to an accident, resulting in death or serious injury. When installing the driver’s floor mat
Before driving
|
 For safe use
...
 For safety drive
For safe driving, adjust the seat and mirror to an appropriate
position before driving.
...
Other materials:
Removal
1. REMOVE WINDSHIELD WIPER MOTOR ASSEMBLY
2. REMOVE FRONT OUTER COWL TOP PANEL SUBASSEMBLY
3. DRAIN ENGINE COOLANT
4. REMOVE V-BANK COVER SUB-ASSEMBLY
5. REMOVE NO. 2 AIR CLEANER INLET
6. REMOVE NO. 1 AIR CLEANER INLET
7. REMOVE AIR CLEANER CAP SUB-ASSEMBLY
Disconnect the 3 vacuum hoses.
...
Rear power window switch
INSPECTION
1. INSPECT POWER WINDOW REGULATOR SWITCH ASSEMBLY REAR
Check the resistance between the switch terminals
when the switch is operated.
Standard
If the result is not as specified, replace the switch
assembly. ...
U151e automatic transaxle
SST
RECOMMENDED TOOLS
EQUIPMENT
LUBRICANT
SSM
...
