Toyota Sienna Service Manual: Crankshaft position sensor
Components
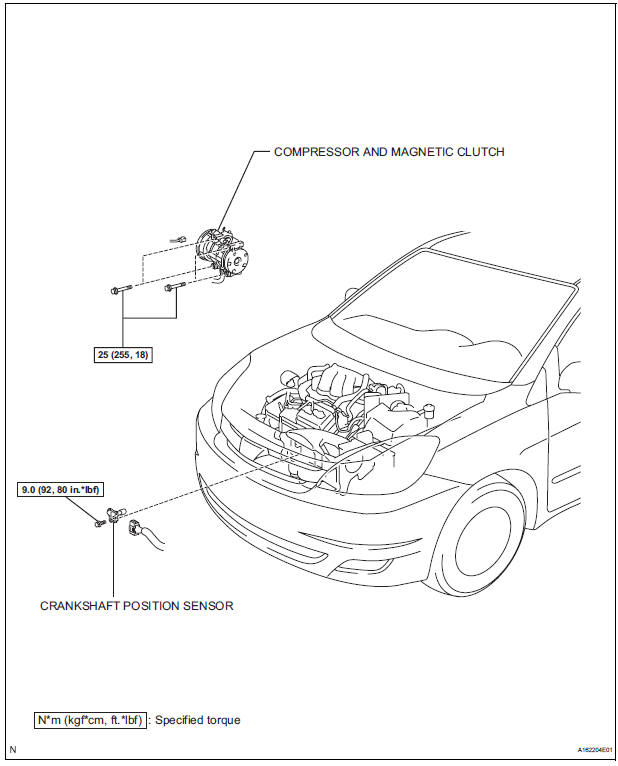
Removal
1. Remove compressor and magnetic clutch
HINT: (See page AC-227 )
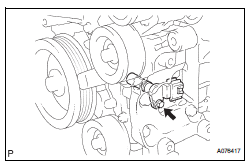
2. REMOVE CRANKSHAFT POSITION SENSOR
(a) Disconnect the crankshaft position sensor connector.
(b) Remove the bolt, and then remove the crankshaft position sensor.
INSPECTION
1. INSPECT CRANKSHAFT POSITION SENSOR
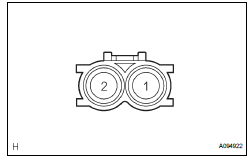
(a) Using an ohmmeter, measure the resistance between the terminals.
Standard resistance 
NOTICE:
|
If the resistance is not as specified, replace the crankshaft position sensor.
INSTALLATION
1. INSTALL CRANKSHAFT POSITION SENSOR
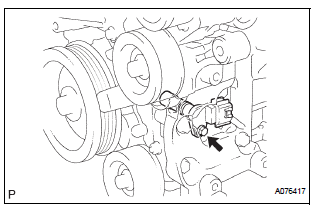
(a) Apply a light coat of engine oil to the O-ring on the crankshaft position sensor.
(b) Install the crankshaft position sensor with the bolt.
Torque: 9.0 N*m (92 kgf*cm, 80 in.*lbf) (c) Connect the crankshaft position sensor connector.
2. INSTALL COMPRESSOR AND MAGNETIC CLUTCH
HINT: (See page AC-231)
 Vvt sensor
COMPONENTS
ON-VEHICLE INSPECTION
1. CHECK VVT SENSOR OUTPUT VOLTAGE
(a) Turn the ignition switch to the ON position.
(b) Check the voltage between the specified terminal
and body grou ...
 Engine coolant temperature sensor
COMPONENTS
REMOVAL
1. DRAIN ENGINE COOLANT (See page CO-6)
2. REMOVE V-BANK COVER SUB-ASSEMBLY (See
page EM-28)
3. REMOVE NO. 2 AIR CLEANER INLET (See page EM-
28)
4. REMOVE NO. 1 AIR CLEAN ...
Other materials:
Shift Solenoid "D" Performance (Shift Solenoid
Valve S4)
SYSTEM DESCRIPTION
The ECM uses signals from the vehicle speed sensor to detect the actual gear
position (1st, 2nd, 3rd, 4th
or 5th gear).
Then the ECM compares the actual gear with the shift schedule in the ECM memory
to detect mechanical
problems of the shift solenoid valves, valve b ...
Differential oil
Adjustment
1. INSPECT DIFFERENTIAL OIL
(a) Stop the vehicle on the level place.
(b) Remove the differential filler plug and gasket.
(c) Check that the oil surface is within 5 mm (0.20 in.)
from the lowest position of the inner surface of the
differential filler plug opening.
NOTICE:
...
Check for short circuit
(a) If the wire harness is ground shorted (Fig. 5), locate the section by
conducting a resistance check with the body ground (below).
(b) Check the resistance with the body ground.
(1) Disconnect connectors A and C and measure
the resistance.
Standard resistance (Fig. 6)
HIN ...
