Toyota Sienna Service Manual: Disassembly
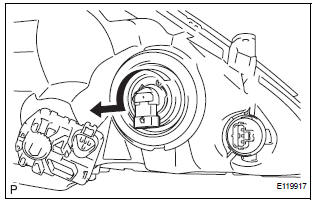
1. REMOVE NO. 1 HEADLIGHT BULB (HALOGEN HEADLIGHT)
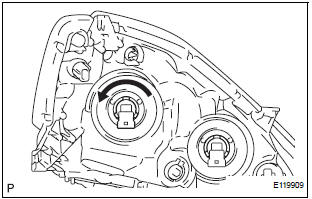
- Turn in the direction indicated by the arrow and remove the No. 1 headlight bulb.
2. REMOVE DISCHARGE HEADLIGHT BULB (DISCHARGE HEADLIGHT)
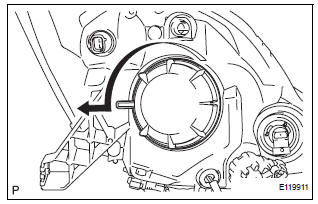
- Turn in the direction indicated by the arrow and disconnect the socket.
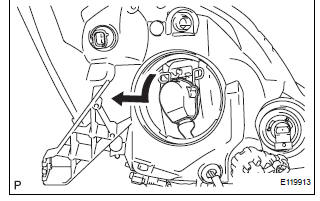
- Release the lock of the set spring and remove the discharge headlight bulb as shown in the illustration.
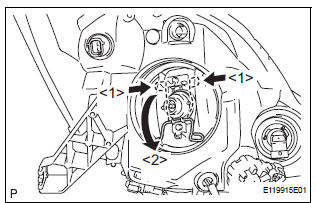
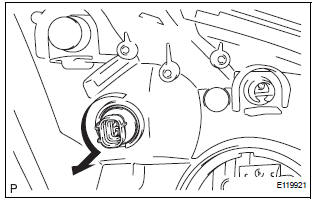
3. REMOVE NO. 2 HEADLIGHT BULB
- Turn in the direction indicated by the arrow and remove the No. 2 headlight bulb.
4. REMOVE FRONT TURN SIGNAL LIGHT BULB
- Turn in the direction indicated by the arrow and remove the front turn signal light bulb and front turn signal light socket as a unit.
- Remove the front turn signal light bulb from the front turn signal light socket.
5. REMOVE FRONT SIDE MARKER LIGHT BULB
- Turn in the direction indicated by the arrow and remove the side marker light bulb and side marker light socket as a unit.
- Remove the side marker light bulb from the side marker light socket.
6. REMOVE LIGHT CONTROL ECU (DISCHARGE HEADLIGHT)
- Remove the 4 screws and headlight cover.
- Remove the headlight gasket.
- Remove the 2 screws.

- Disengage the claw.
- Disconnect the connector and remove the light control ECU.
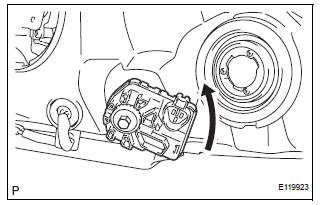
- Remove the headlight leveling motor assembly as shown in the illustration.
- Remove the headlight leveling motor base packing.
 Removal
1. DISCONNECT CABLE FROM NEGATIVE BATTERY
TERMINAL
2. REMOVE FRONT BUMPER ASSEMBLY
3. REMOVE HEADLIGHT ASSEMBLY
Disconnect the connectors.
Remove the bolt, 3 screws and headligh ...
 Adjustment
1. VEHICLE PREPARATION FOR HEADLIGHT AIMING
ADJUSTMENT
Prepare the vehicle:
Ensure there is no damage or deformation to the
body around the headlights.
Fill the fuel t ...
Other materials:
Slide Door Closer RH does not Operate
DESCRIPTION
The slide door ECU RH controls the slide door closer. In response to the
signals output from the switches
in the slide door lock, the slide door closer drives the closer motor.
HINT:
The slide door closer system operates regardless of the power slide door main
switch ON / OFF.
W ...
Inspection
1. INSPECT OIL PUMP ASSEMBLY
(a) Turn the drive gear with the 2 screwdrivers and
make sure that it rotates smoothly.
NOTICE:
Be careful not to damage the oil seal lip.
2. INSPECT CLEARANCE OF OIL PUMP ASSEMBLY
(a) Push the driven gear to one side of the body.
(b) Using ...
Gateway ECU Communication Stop Mode
DESCRIPTION
Detection Item
Symptom
Trouble Area
Gateway ECU
Communication Stop
Mode
"Gateway" is not displayed on the "Communication
Bus Check" screen of the intelligent tester
Applies to "Gateway ECU Communication ...
