Toyota Sienna Service Manual: Disassembly
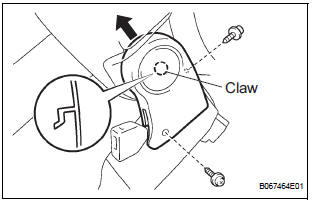
1. REMOVE RH SEAT REAR SEAT RECLINING COVER
- Remove the 2 screws.
- Remove the RH seat rear seat reclining cover by pulling it out in the arrow mark direction shown in the illustration.
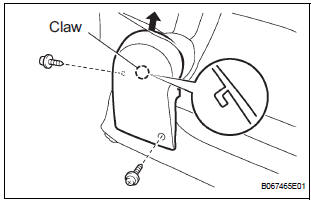
2. REMOVE LH SEAT REAR SEAT RECLINING COVER
- Remove the 2 screws.
- Remove the LH seat rear seat reclining cover by pulling it out in the arrow mark direction shown in the illustration.
3. REMOVE REAR SEATBACK ASSEMBLY RH
- Disengage the reclining remote control cable.
- Disengage the rear seat lock release strap cable.
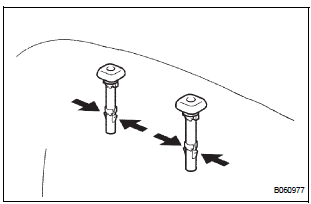
- Remove the 4 bolts and rear seatback assembly RH.
4. REMOVE REAR NO. 2 SEAT BELT ASSEMBLY INNER RH
- Remove the bolt and rear No.2 seat belt assembly inner RH.
5. REMOVE NO. 2 REAR SEAT COVER BEZEL
- Remove the 3 screws and No. 2 rear seat cover bezel.
6. REMOVE NO. 2 SEATBACK LOCK CONTROL BEZEL
- Remove the screw and No. 2 seatback lock control bezel.
7. REMOVE NO. 2 SEATBACK COVER RH
- Disengage the claw and remove the 2 headrest supports.
- Remove the hog rings and seatback cover together with the pad.
- Remove the hog rings and No. 2 seatback cover RH.
8. REMOVE REAR SEAT LOCK RELEASE STRAP ASSEMBLY
- Remove the nut and rear seat lock release strap assembly.
9. REMOVE REAR SEAT BACK CONNECTING RH WIRE
- Remove the nut and rear seatback connecting RH wire.
10. REMOVE RECLINING RELEASE HANDLE SUBASSEMBLY RH
- Remove the screw and reclining release handle sub-assembly RH.
11. REMOVE RECLINING ADJUSTER RELEASE HANDLE NO. 2 RH
- Remove the nut and reclining adjuster release handle No.2 RH.
12. REMOVE NO. 2 SEAT CUSHION COVER SUBASSEMBLY RH
- Remove the hog rings and cushion cover together with the pad.
- Remove the hog rings and No. 2 seat cushion cover sub-assembly RH.
13. REMOVE LOCUS CABLE RH
- Remove the nut and locus cable RH.
14. REMOVE NO. 2 SEAT CUSHION SPRING ASSEMBLY RH
15. REMOVE REAR SEAT STAY SUB-ASSEMBLY
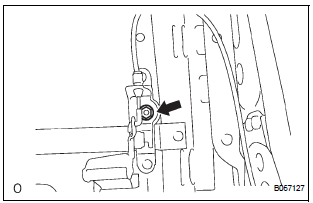
- Remove the nut and seat stay sub-assembly.
 Removal
1. REMOVE REAR SEAT LEG SIDE GARNISH SUBASSEMBLY RH
Disengage the clips and remove the seat leg side
garnish sub-assembly RH.
2. REMOVE REAR NO. 2 SEAT ASSEMBLY RH
Remove ...
 Reassembly
1. INSTALL REAR SEAT STAY SUB-ASSEMBLY
Install the seat stay sub-assembly with the nut.
Torque: 5.5 N*m (56 kgf*cm, 49 in.*lbf)
2. INSTALL NO. 2 SEAT CUSHION SPRING ASSEMBLY
RH
3. INS ...
Other materials:
Vehicle Speed Sensor "A"
DESCRIPTION
The speed sensor detects the wheel speed and sends the appropriate signals to
the skid control ECU.
The skid control ECU converts these wheel speed signals into a 4-pulse signal
and outputs it to the ECM
via the combination meter. The ECM determines the vehicle speed based o ...
Installation
1. INSTALL ENGINE COOLANT TEMPERATURE SENSOR
Install the engine coolant temperature sensor.
Torque: 20 N*m (204 kgf*cm, 15 ft.*lbf)
Connect the engine coolant temperature sensor
connector.
2. INSTALL AIR CLEANER CASE SUB-ASSEMBLY
3. INSTALL AIR CLEANER CAP SUB-ASSEMBLY
...
Inspection
1. INSPECT TIRE PRESSURE WARNING RESET SWITCH
(a) Remove the tire pressure warning reset switch.
(b) Measure the resistance between terminals 1 and 2
of the tire pressure warning reset switch when the
tire pressure warning switch is ON and OFF.
Standard resistance
If the result is not as ...
