Toyota Sienna Service Manual: Disassembly
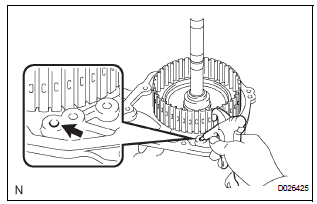
1. INSPECT PACK CLEARANCE OF REVERSE CLUTCH
HINT: (See page AX-249)
2. INSPECT PACK CLEARANCE OF DIRECT CLUTCH AND OVERDRIVE CLUTCH
HINT: (See page AX-249)
3. REMOVE DIRECT MULTIPLE DISC CLUTCH DISC
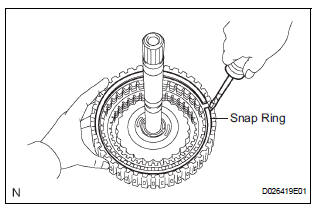
(a) Using a screwdriver, remove the snap ring from the intermediate shaft.
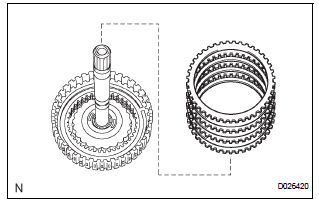
(b) Remove the flange, 3 discs, 3 plates and cushion plate from the intermediate shaft.
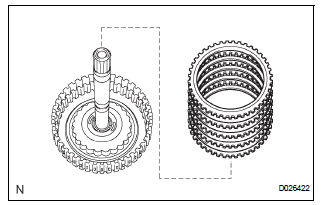
4. REMOVE OVERDRIVE DIRECT CLUTCH DISC
(a) Using a screwdriver, remove the snap ring from the intermediate shaft.
(b) Remove the flange, 4 discs and 4 plates from the intermediate shaft.
5. REMOVE OVERDRIVE CLUTCH RETURN SPRING SUB-ASSEMBLY
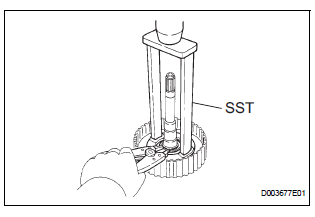
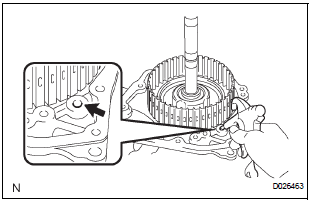
(a) Place SST on the clutch balancer and compress the spring with a press.
SST 09387-00020
(b) Using a snap ring expander, remove the snap ring from the direct clutch drum.
NOTICE:
- Stop the press when the spring seat is lowered to the place 1 to 2 mm (0.039 to 0.078 in.) from the snap ring groove.
- This prevents the spring seat from being deformed.
- Do not expand the snap ring excessively.
- This prevents the spring seat from being deformed.
- Do not expand the snap ring excessively.
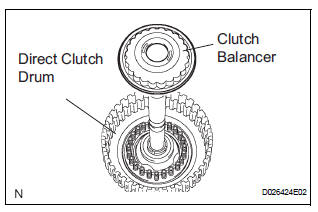
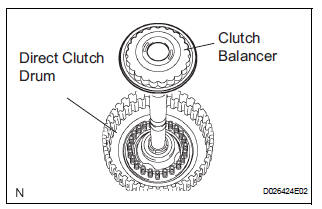
(c) Remove the clutch balancer from the direct clutch drum.
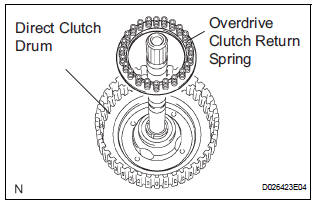
(d) Remove the overdrive clutch return spring from the direct clutch drum.
6. REMOVE OVERDRIVE DIRECT CLUTCH PISTON
(a) Install the intermediate shaft on the transaxle rear cover.
(b) Holding the direct clutch piston with your hand, apply compressed air (392 kPa, 4.0 kgf/cm2, 57 psi) to the transaxle rear cover to remove the direct clutch piston.
7. REMOVE OVERDRIVE DIRECT CLUTCH DRUM SUBASSEMBLY
(a) Holding the direct clutch drum by hand, apply compressed air (392 kPa, 4.0 kgf/cm2, 57 psi) to the transaxle rear cover to remove the direct clutch drum.
8. REMOVE OVERDRIVE DIRECT CLUTCH O-RING
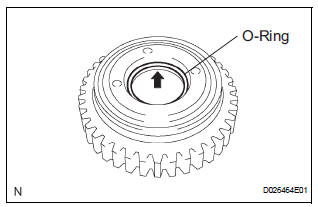
(a) Using a screwdriver, remove the O-ring from the direct clutch drum.
 Direct clutch
Components
...
 Inspection
1. Inspect pack clearance of reverse clutch
(A) install the intermediate shaft and needle roller
bearing onto the transaxle rear cover.
(B) using a dial indicator, measure the reverse clutch
...
Other materials:
Cup holders
Front
Press in and release the front cup
holder.
Console box type A
(if equipped)
Console box type B
(if equipped)
Pull the lid down.
Console box type C
(if equipped)
Second seat (if equipped)
Removing the second center seat.
Rear
...
DSP Error
DTC 44-78 DSP Error
DESCRIPTION
DTC No.
DTC Detecting Condition
Trouble Area
44-78
An error occurs during the decode process (MP3/
WMA).
-
INSPECTION PROCEDURE
HINT:
After the inspection is completed, clear the DTCs.
NOTICE:
Thi ...
On-vehicle inspection
1. INSPECT SPEEDOMETER
Check the operation.
Using a speedometer tester, check the
speedometer indication according to the table
below.
Reference: mph (U.S.A.)
Reference: km/h (Canada)
NOTICE:
Tire wear as well as over or under inflation
will cause errors.
...
