
Toyota Sienna Service Manual: For vehicles equipped with mobile communication systems
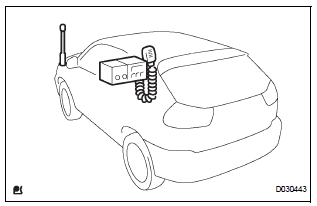 FOR VEHICLES EQUIPPED WITH MOBILE COMMUNICATION SYSTEMS
(a) Install the antenna far away from the ECU and sensors of the vehicle electronic systems as possible.
(b) Install an antenna feeder at least 20 cm (7.87 in.) away from the ECU and sensors of the vehicle electronic systems. For details about ECU and sensors locations, refer to the section on the applicable components.
(c) Keep the antenna and feeder separate from other wirings as much as possible. This will prevent signals sent from the communication equipment from affecting vehicle equipment and vice-versa.
(d) Check that the antenna and feeder are correctly adjusted.
(e) Do not install any high-powered mobile communication system.
 Handling of hose clamps
HANDLING OF HOSE CLAMPS
(a) Before removing the hose, check the clamp position
so that it can be reinstalled in the same position.
(b) Replace any deformed or dented clamps with new
ones.
...
 When servicing full-time 4wd vehicles
The full-time 4WD SIENNA is equipped with the open
center differential system.
If incorrect preparations or test procedures are used, the
test will not only be unsuccessful, but may be dangerous
...
Other materials:
Installation
1. INSTALL SHIFT LEVER ASSEMBLY
(a) Install shift lever assembly to the vehicle with the 4
bolts.
Torque: 21 N*m (214 kgf*cm, 15 ft.*lbf)
NOTICE:
Into datum hole of shift lever into datum pin of
instrument lower.
(b) Connect the 2 connectors to the shift lever
assembly.
...
Terminals of ecm
Sfi system
Hint:
The standard normal voltage between each pair of the
ECM terminals is shown in the table below. The
appropriate conditions for checking each pair of the
terminals are also indicated.
The check results should be compared with the standard
normal voltage for that pair of te ...
Inspection
1. INSPECT VANE PUMP SHAFT AND BUSHING IN VANE PUMP FRONT HOUSING
(a) Using a micrometer, measure the outer diameter [a]
of the vane pump shaft with pulley.
(b) Using vernier calipers, measure the inner diameter
[b] of the vane pump front housing bushing.
(c) Calculate the oil clearance ...
