Toyota Sienna Service Manual: Front axle hub bolt
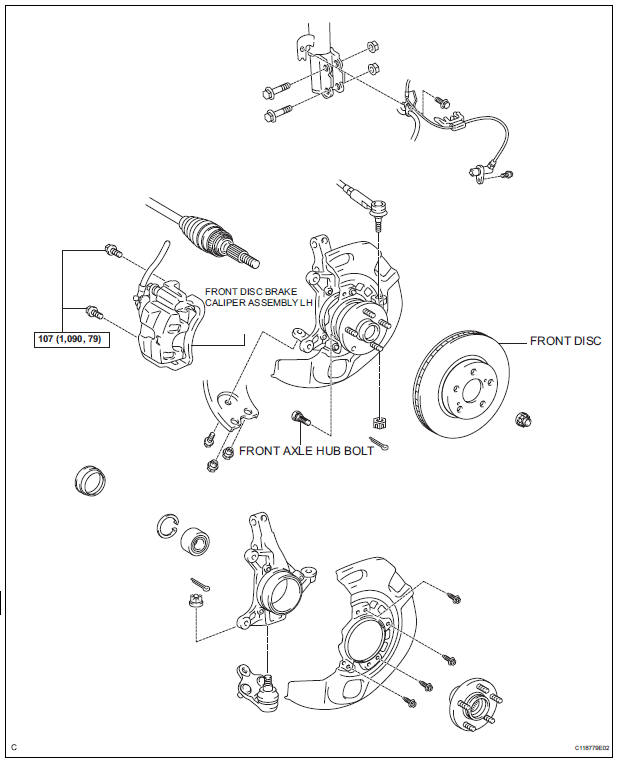
COMPONENTS
Replacement
HINT: Replace the RH side using the same procedures as for the LH side.
1. REMOVE FRONT WHEEL
2. SEPARATE FRONT DISC BRAKE CALIPER ASSEMBLY LH (See page AH-5)
3. REMOVE FRONT DISC
4. REMOVE FRONT AXLE LH HUB BOLT
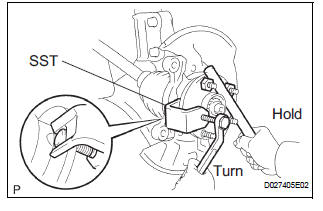
(a) Temporarily install the 2 nuts and washers to the front axle LH hub bolt as shown in the illustration.
(b) Using SST(s) and a screwdriver or an equivalent to hold the front axle, remove the front axle LH hub bolt.
SST 09628-10011
5. INSTALL FRONT AXLE LH HUB BOLT
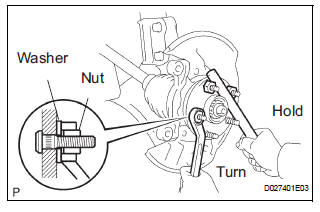
(a) Install a washer and nut to a new front axle LH hub bolt as shown in the illustration.
(b) Using a screwdriver to hold the front axle, install the hub bolt by torquing the nut.
6. INSTALL FRONT DISC
7. INSTALL FRONT DISC BRAKE CALIPER ASSEMBLY LH (See page AH-9)
8. INSTALL FRONT WHEEL Torque: 103 N*m (1,050 kgf*cm, 76 ft.*lbf)
 Axle system
PROBLEM SYMPTOMS TABLE
Use the table below to help you find the cause of the problem.
The numbers indicate the priority of the likely cause of
problem. Check each part in order. If necessary, rep ...
 Front axle hub
COMPONENTS
...
Other materials:
Diagnosis system
1. CHECK DLC3
The vehicle's ECU uses ISO 15765-4 for
communication protocol. The terminal arrangement
of the DLC3 complies with SAE J1962 and matches
the ISO 15765-4 format
NOTICE:
*: Before measuring the resistance, leave the
vehicle as is for at least 1 minute and do not
oper ...
System description
1. DESCRIPTION OF OCCUPANT CLASSIFICATION SYSTEM
GENERAL DESCRIPTION.
In the occupant classification system, the
occupant classification ECU calculates the
weight of the occupant based on a signal from
the occupant classification sensors. This system
recognizes the occu ...
Before driving
Floor mat
Use only floor mats designed specifically for vehicles of the same
model and model year as your vehicle. Fix them securely in place
onto the carpet.
Insert the retaining hooks (clips)
into the floor mat eyelets.
Turn the upper knob of each
retaining hook (clip) to secu ...
