Toyota Sienna Service Manual: Front No. 1 speaker
COMPONENTS
ON-VEHICLE INSPECTION
1. INSPECT FRONT NO.1 SPEAKER
HINT: Remove interior parts so that the front No.1 speaker can be seen.
- Check the speaker installation.
OK: The speaker is securely installed.
If the result is not as specified, reinstall the front No.1 speaker.
- Visually check the speaker.
OK: The cone paper of the speaker is not torn.
If the result is not as specified, replace the front No.1 speaker.
- Speaker resistance check
- Disconnect the front No.1 speaker connector.
- Measure the resistance between the terminals of the speaker.
Standard resistance:
6 Speaker system:
Approximately 4 Ω
10 Speaker system:
4 to 6 Ω
If the result is not as specified, replace the front No.1 speaker.
REMOVAL
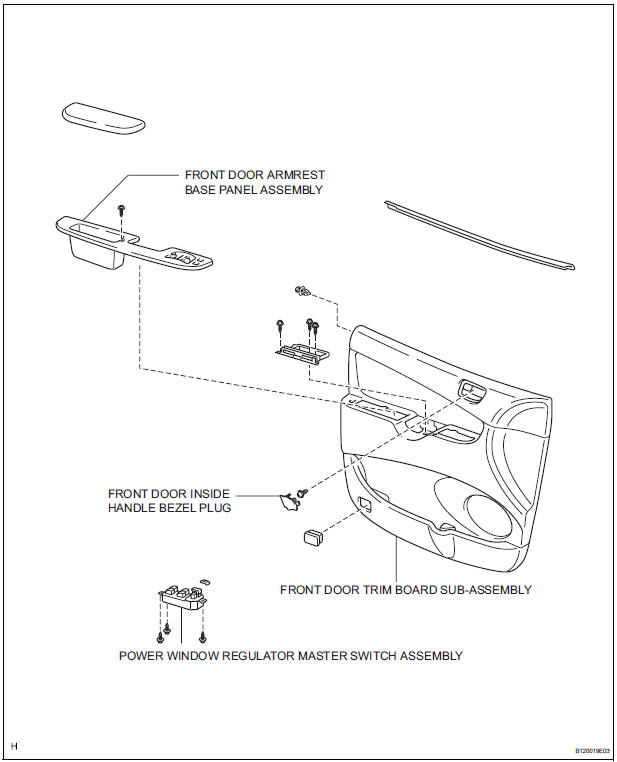
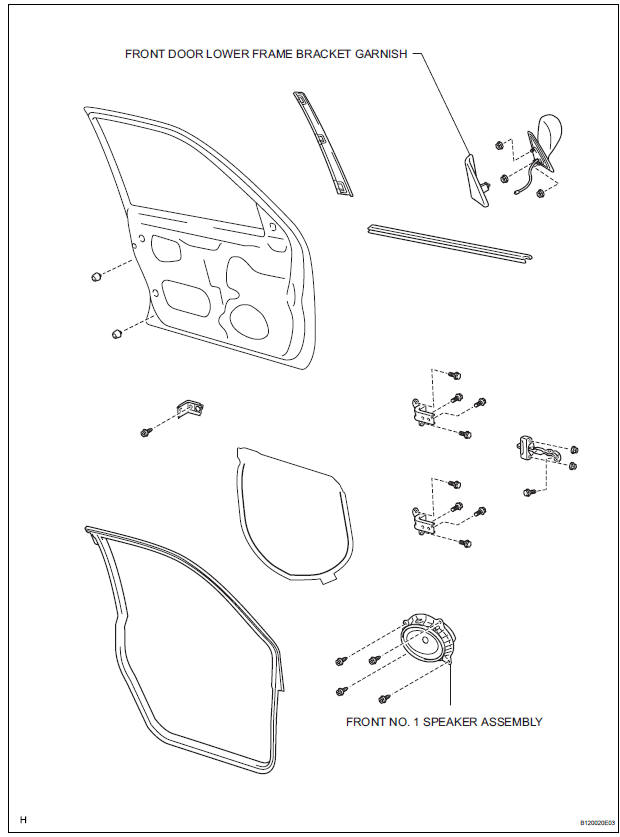
1. REMOVE FRONT DOOR LOWER FRAME BRACKET GARNISH
2. REMOVE FRONT DOOR INSIDE HANDLE BEZEL PLUG
3. REMOVE POWER WINDOW REGULATOR MASTER SWITCH ASSEMBLY
4. REMOVE FRONT DOOR ARMREST BASE PANEL ASSEMBLY
5. REMOVE FRONT DOOR TRIM BOARD SUBASSEMBLY
6. REMOVE FRONT NO. 1 SPEAKER ASSEMBLY
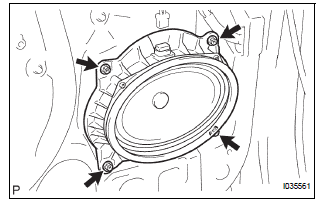
- Disconnect the connector.
- Remove the 4 screws and front No. 1 speaker assembly.
INSTALLATION
1. INSTALL FRONT NO. 1 SPEAKER ASSEMBLY
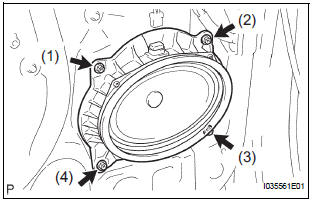
- Install the front No. 1 speaker assembly with the 4
screws.
NOTICE: Tighten the screws in order shown in the illustration to install the front No. 1 speaker assembly.
- Connect the connector.
2. INSTALL FRONT DOOR TRIM BOARD SUBASSEMBLY
3. INSTALL FRONT DOOR ARMREST BASE PANEL ASSEMBLY
4. INSTALL POWER WINDOW REGULATOR MASTER SWITCH ASSEMBLY
5. INSTALL FRONT DOOR INSIDE HANDLE BEZEL PLUG
6. INSTALL FRONT DOOR LOWER FRAME BRACKET GARNISH
 Window glass antenna wire
INSPECTION
1. INSPECT WINDOW GLASS ANTENNA WIRE
Inspect the wind glass antenna wire.
NOTICE:
When cleaning the glass, use a soft, dry cloth,
and wipe the glass in the direction of the ...
 Front No. 2 speaker
COMPONENTS
ON-VEHICLE INSPECTION
1. INSPECT FRONT NO.2 SPEAKER
HINT:
Remove interior parts so that the front No.2 speaker can
be seen.
Check the speaker installation.
OK:
The sp ...
Other materials:
Drive shaft system
PRECAUTION
1. NOTICE OF REMOVING AND INSTALLING FRONT
DRIVE SHAFT ASSEMBLY RH
(a) When removing and installing the front drive shaft
assembly RH in a 4WD vehicle, be sure to first drain
all the transaxle oil and transfer oil. If removal and
installation is carried out without draining these oi ...
Disassembly
1. REMOVE NO. 2 FRONT AXLE INBOARD JOINT BOOT LH CLAMP
(a) Using pliers, remove the No. 2 front axle inboard
joint boot LH clamp, as shown in the illustration.
2. REMOVE FRONT AXLE INBOARD JOINT BOOT LH
CLAMP
(a) Remove the front axle inboard joint boot LH clamp
using the same procedures a ...
Oil and oil filter
COMPONENTS
REPLACEMENT
CAUTION:
Prolonged and repeated contact with engine oil will
result in the removal of natural oils from the skin,
leading to dryness, irritation and dermatitis. In
addition, used engine oil contains potentially harmful
contaminants which may caus ...
