Toyota Sienna Service Manual: Installation
1. INSTALL PARKING BRAKE CONTROL PEDAL ASSEMBLY
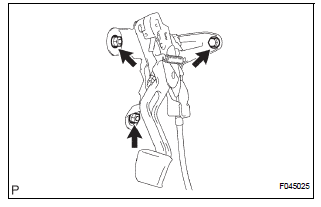
(a) Install the parking brake control pedal assembly with a bolt and the 2 nuts.
Torque: 39 N*m (398 kgf*cm, 29 ft.*lbf) (b) Connect the parking brake switch connector.
(c) Connect the instrument panel junction block assembly w/ wiring harness connector with the 4 nuts.
Torque: 7.3 N*m (74 kgf*cm, 65 in.*lbf)
2. INSTALL REAR FLOOR SEAT LOCK COVER
3. INSTALL REAR FLOOR SEAT LOCK COVER
4. INSTALL REAR SEAT NO.1 ASSEMBLY
HINT:
- Captain Seat Type (See page SE-75)
- Center Seat Type (See page SE-82)
5. INSTALL FRONT SEAT ASSEMBLY LH
HINT:
- Manual Seat Type (See page SE-55)
- Power Seat Type (See page SE-66)
- Fold Flat Type (See page SE-45)
6. INSPECT PARKING BRAKE PEDAL TRAVEL (See page PB-1)
7. ADJUST PARKING BRAKE PEDAL TRAVEL (See page PB-1)
 Reassembly
1. INSTALL PARKING BRAKE SWITCH ASSEMBLY
(a) Install the parking brake switch to the parking brake
pedal with the screw.
2. INSTALL PARKING BRAKE CABLE ASSEMBLY NO.1
(a) Connect the parking brake ...
 Parking brake cable
Components
...
Other materials:
Removal
1. DRAIN BRAKE FLUID
NOTICE:
Wash brake fluid off immediately if it adheres to any
painted surface.
2. DISCONNECT BATTERY NEGATIVE TERMINAL
3. REMOVE AIR CLEANER ASSEMBLY WITH HOSE
4. REMOVE BRAKE ACTUATOR WITH BRACKET
(a) Release the latch of the brake actuator connector to
disconnect t ...
DTC check / clear
1. CHECK DTC (USING INTELLIGENT TESTER)
Checking DTCs.
Connect the intelligent tester to the DLC3.
Turn the ignition switch ON.
Read DTCs by following the prompts on the
tester screen.
HINT:
Refer to the intelligent tester operator's manual
for furthe ...
Open in One Side of CAN Branch Line
DESCRIPTION
If 2 or more ECUs and/or sensors do not appear on the intelligent tester
"Communication Bus Check"
screen, one side of the CAN branch wire may be open. (One side of the CAN-H
[branch wire] / CAN-L
[branch wire] of the ECU and/or sensor is open.)
Symptom
...
