Toyota Sienna Service Manual: Installation
1. INSTALL STEERING PAD

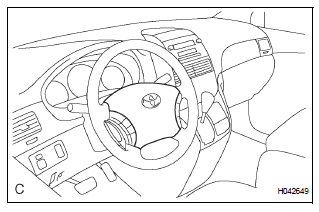
- Support the steering pad with one hand as shown in the illustration.
- Connect the 2 connectors to the steering pad.
NOTICE: When handling the airbag connector, take care not to damage the airbag wire harness.
- Connect the horn connector.
- Confirm that the circumference groove of the "torx" screw fits in the screw case, and place the steering pad onto the steering wheel assembly.
- Using a "torx" socket wrench (T30), tighten the 2 "torx" screws.
Torque: 8.8 N*m (90 kgf*cm, 78 in.*lbf)
2. INSTALL STEERING WHEEL NO.3 COVER LOWER
- Install the steering wheel No.3 cover lower.
3. INSTALL STEERING WHEEL NO.2 COVER LOWER
- Install the steering wheel No.2 cover lower.
4. CONNECT CABLE TO NEGATIVE BATTERY TERMINAL
5. INSPECT STEERING PAD
- With the steering pad installed on the vehicle, perform a visual check. If there are any defects as mentioned below, replace the steering pad with a new one: Cuts, minute cracks or marked discoloration on the steering pad top surface or in the grooved portion.
- Make sure that the horn sounds.
HINT: If the horn does not sound, inspect the horn system.
6. PERFORM INITIALIZATION
- Perform initialization.
HINT: Some systems need initialization when disconnecting the cable from the negative battery terminal.
7. INSPECT SRS WARNING LIGHT
- Inspect the SRS warning light
 Removal
1. PRECAUTION
CAUTION: Be sure to read "PRECAUTION" thoroughly before
servicing.
2. DISCONNECT CABLE FROM NEGATIVE BATTERY
TERMINAL
CAUTION:
Wait for 90 seconds after disconnecting th ...
 Disposal
HINT:
When scrapping a vehicle equipped with the SRS or
disposing of the steering pad, be sure to deploy the airbag
first in accordance with the procedure described below. If any
abnormality occur ...
Other materials:
Oxygen (A/F) Sensor Heater Control Circuit
HINT
Although the DTC titles say the oxygen sensor, these DTCs relate to the
Air-Fuel Ratio (A/F) sensor.
Sensor 1 refers to the sensor mounted in front of the Three-Way
Catalytic Converter (TWC) and
located near the engine assembly.
DESCRIPTION
Refer to DTC P2195 (See page ES- ...
Short to GND in Rear Curtain Shield Squib RH
Circuit
DTC B1632/81 Short to GND in Rear Curtain Shield Squib RH
Circuit
DESCRIPTION
The rear curtain shield squib RH circuit consists of the center airbag sensor
assembly and the curtain
shield airbag assembly RH.
The circuit instructs the SRS to deploy when deployment conditions are met.
DTC ...
Diagnostic trouble code chart
HINT:
The parameters listed in the chart may not confirm exactly to
those read during the DTC check due to the type of
instrument or other factors.
If a trouble code is displayed during the DTC check in the
check mode, check the circuit for the code listed in the table
below. For details of ...
