Toyota Sienna Service Manual: Installation
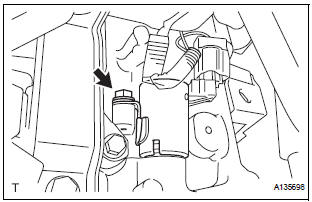
1. INSTALL CAMSHAFT TIMING OIL CONTROL VALVE ASSEMBLY (for Bank 2 Exhaust Side)
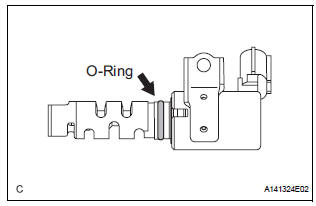
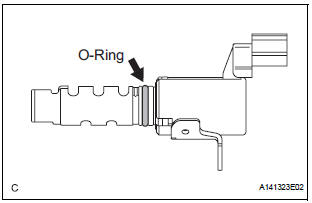
- Apply a light coat of engine oil to the new O-ring and install it to the camshaft timing oil control valve.
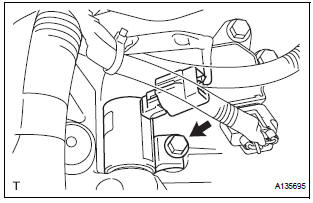
- Install the camshaft timing oil control valve
assembly with the bolt.
Torque: 10 N*m (102 kgf*cm, 7 ft.*lbf)
- Connect the camshaft timing oil control valve assembly connector
2. INSTALL CAMSHAFT TIMING OIL CONTROL VALVE ASSEMBLY (for Bank 2 Intake Side)
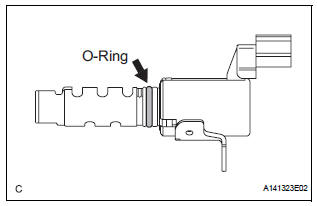
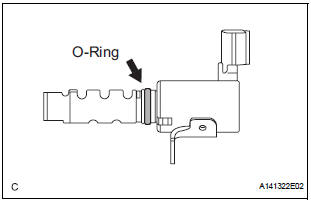
- Apply a light coat of engine oil to the new O-ring and install it to the camshaft timing oil control valve.
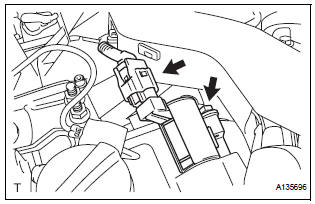
- Install the camshaft timing oil control valve
assembly with the bolt.
Torque: 10 N*m (102 kgf*cm, 7 ft.*lbf) Connect the camshaft timing oil control valve assembly connector
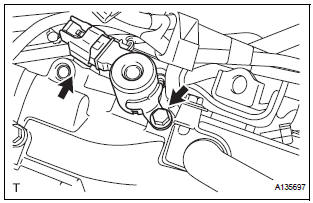
3. INSTALL CAMSHAFT TIMING OIL CONTROL VALVE ASSEMBLY (for Bank 1 Exhaust Side)
- Apply a light coat of engine oil to the new O-ring and install it to the camshaft timing oil control valve.
- Install the camshaft timing oil control valve
assembly with the bolt.
Torque: 10 N*m (102 kgf*cm, 7 ft.*lbf)
- Connect the camshaft timing oil control valve assembly connector
4. INSTALL CAMSHAFT TIMING OIL CONTROL VALVE ASSEMBLY (for Bank 1 Intake Side)
- Apply a light coat of engine oil to the new O-ring and install it to the camshaft timing oil control valve.
- Install the camshaft timing oil control valve
assembly with the bolt.
Torque: 10 N*m (102 kgf*cm, 7 ft.*lbf)
- Connect the camshaft timing oil control valve assembly connector.
5. INSTALL INTAKE AIR SURGE TANK ASSEMBLY
6. INSTALL AIR CLEANER CASE SUB-ASSEMBLY
7. INSTALL AIR CLEANER CAP SUB-ASSEMBLY
8. INSTALL NO. 1 AIR CLEANER INLET
9. INSTALL NO. 2 AIR CLEANER INLET
10. ADD ENGINE COOLANT
11. INSPECT FOR ENGINE COOLANT LEAK
12. INSPECT FOR ENGINE OIL LEAK
13. INSTALL V-BANK COVER SUB-ASSEMBLY
14. INSTALL FRONT OUTER COWL TOP PANEL SUBASSEMBLY
15. INSTALL WINDSHIELD WIPER MOTOR ASSEMBLY
 Inspection
1. INSPECT CAMSHAFT TIMING OIL CONTROL VALVE ASSEMBLY
Resistance inspection
Using an ohmmeter, measure the resistance
between the terminals.
Resistance:
6.9 to 7.9 ] ...
 Throttle body
...
Other materials:
Power Seat ECU Communication Stop
DTC B1272 Power Seat ECU Communication Stop
DESCRIPTION
This DTC is detected when communication between the seat position control ECU
and the multiplex
network gateway ECU stops for more than 10 seconds.
DTC No.
DTC Detection Condition
Trouble Area
B1272
...
Cursor or Map Rotates when Vehicle Stopped
INSPECTION PROCEDURE
1 CHECK CONDITION
Check with the customer if the vehicle has been turned
by a turntable.
OK:
Vehicle has not been turned by turntable.
HINT:
If the vehicle is turned on a turntable with the ignition
switch on, the system may store the angular velocity. As
a ...
CD-ROM Abnormal/ CD-ROM Abnormal
DTC 62-43 CD-ROM Abnormal
DTC 63-43 CD-ROM Abnormal
DESCRIPTION
DTC No.
DTC Detecting Condition
Trouble Area
62-43
CD-ROM operation is abnormal
CD
Radio receiver
63-43
CD-ROM operation is abnormal
INSPECTION PROCEDURE
HIN ...
