Toyota Sienna Service Manual: Installation
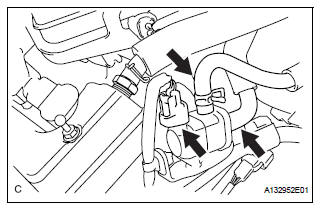
1. Install purge vsv
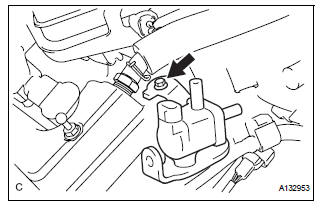
(A) install the purge vsv with the bolt.
Torque: 10 n*m (102 kgf*cm, 7 ft.*Lbf)
(B) connect the 2 vacuum hoses and no. 1 Vacuum switching valve connector.
2. INSTALL V-BANK COVER SUB-ASSEMBLY (See page EM-63) 3. CONNECT CABLE TO NEGATIVE BATTERY TERMINAL
 Inspection
1. INSPECT PURGE VSV
(a) Measure the resistance of the purge VSV.
Standard resistance
If the result is not as specified, replace the purge
VSV.
(b) Check the operation of the purge VSV. ...
 Ventilation valve
Components
...
Other materials:
Sound Signal Circuit between Radio Receiver and Television Display
Assembly
DESCRIPTION
The television display assembly sends a sound signal to the radio receiver
through this circuit.
The sound signal that has been sent is amplified by the stereo component
amplifier or radio receiver
(built-in amplifier), and then is sent to the speakers.
If there is an open or ...
Disassembly
1. Remove rear wheel
2. Drain brake fluid
Notice:
wash the brake fluid off immediately if it attaches to
any painted surface.
3. REMOVE REAR BRAKE DRUM SUB-ASSEMBLY
(a) Release the parking brake lever, and remove the
rear brake drum.
HINT:
If the rear brake drum cannot be removed easily,
p ...
Data list / active test
1. DATA LIST
HINT:
Using the DATA LIST displayed on the intelligent tester,
you can read the value of the switch, sensor, actuator,
etc. without parts removal. Reading the DATA LIST as
the first step of troubleshooting is one way to shorten the
labor time.
Connect the intelligent tes ...
