Toyota Sienna Service Manual: Installation
1. INSTALL WATER PUMP ASSEMBLY
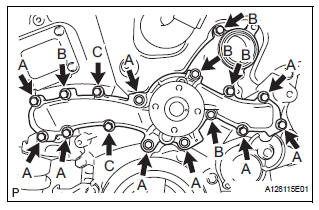
(a) Install a new water pump gasket and the water pump assembly with the 16 bolts.
Torque: Bolt A 21 N*m (214 kgf*cm, 15 ft.*lbf) Bolts B and C 9.1 N*m (93 kgf*cm, 81 in.*lbf)
NOTICE:
|
2. INSTALL WATER INLET HOUSING
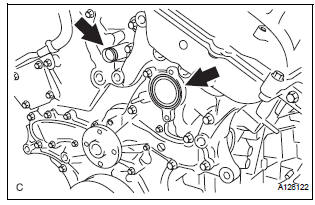
(a) Install a new water inlet housing No. 1 gasket and water outlet pipe O-ring.
(b) Install the water inlet housing with the 2 bolts and nut.
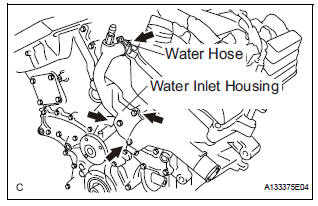
Torque: 10 N*m (102 kgf*cm, 7 ft.*lbf)
| NOTICE: Be careful not to allow the O-ring to get caught between the parts. |
(c) Connect the water hose.
3. INSTALL WATER PUMP PULLEY
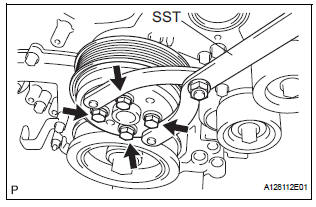
(a) Temporarily install the water pump pulley with the 4 bolts.
(b) Using SST, hold the water pump pulley.
SST 09960-10010 (09962-01000, 09963-00700) (c) Tighten the 4 bolts.
Torque: 21 N*m (214 kgf*cm, 15 ft.*lbf)
4. INSTALL V-RIBBED BELT TENSIONER ASSEMBLY
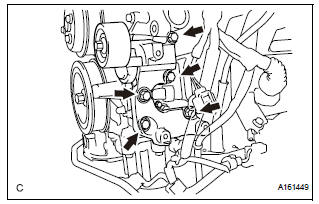
(a) Install the V-ribbed belt tensioner assembly with the 5 bolts.
Torque: 43 N*m (438 kgf*cm, 32 ft.*lbf)
5. INSTALL NO. 2 IDLER PULLEY SUB-ASSEMBLY
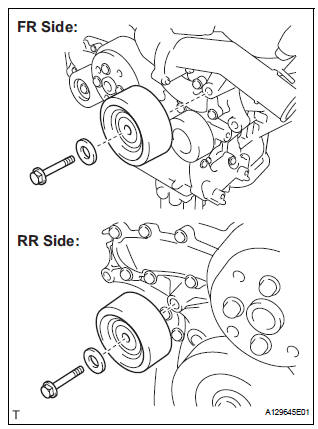
(a) Install the 2 idler pulley cover plates and idler pulley sub-assemblies with the 2 bolts.
Torque: 43 N*m (438 kgf*cm, 32 ft.*lbf)
6. INSTALL NO. 1 ENGINE FRONT MOUNTING BRACKET LH (See page EM-45) 7. INSTALL GENERATOR ASSEMBLY (See page CH-26) 8. INSTALL COMPRESSOR AND MAGNETIC CLUTCH (See page AC-231) 9. INSTALL ENGINE HANGERS (See page EM-50) 10. REMOVE ENGINE STAND 11. INSTALL ENGINE ASSEMBLY WITH TRANSAXLE HINT: See page EM-44 12. ADD ENGINE COOLANT (See page CO-7) 13. INSPECT FOR COOLANT LEAK (See page CO-1)
 Inspection
1. Inspect water pump assembly
(a) Visually check the drain hole and air hole for coolant
leakage.
(b) Turn the pulley, and check that the water pump
bearing moves smoothly and noiselessly.
...
 Thermostat
Components
...
Other materials:
Problem symptoms table
POWER SLIDE DOOR SYSTEM
Symptom
Suspected Area
Power slide door LH does not operate when switch* is
pressed (* switch indicates satellite switch for power
slide door LH and power slide door control switch LH)
ECU-B fuse
Power slide door main switch ...
Test mode procedure
1. SPEED SENSOR SIGNAL CHECK (WHEN USING SST CHECK WIRE):
HINT:
If the ignition switch is turned from the ON to the ACC
or LOCK position during Test Mode, the DTCs of the
signal check function will be erased.
(a) Turn the ignition switch off.
(b) Check that the steering wheel is in th ...
Diagnosis system
1. CHECK DLC3
The vehicle's ECU uses ISO 15765-4 for
communication protocol. The terminal arrangement
of the DLC3 complies with SAE J1962 and matches
the ISO 15765-4 format.
NOTICE:
*: Before measuring the resistance, leave the
vehicle as is for at least 1 minute and do no ...
