Toyota Sienna Service Manual: Rear wiper motor and bracket
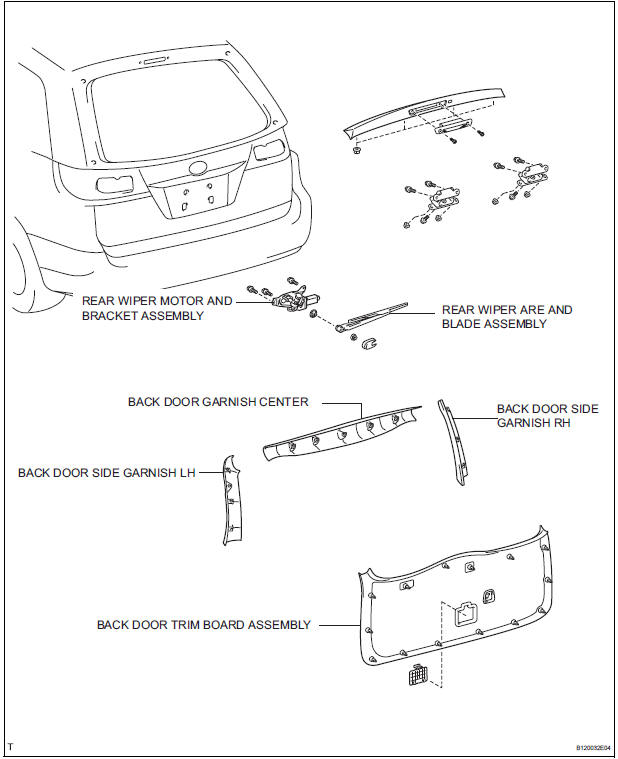
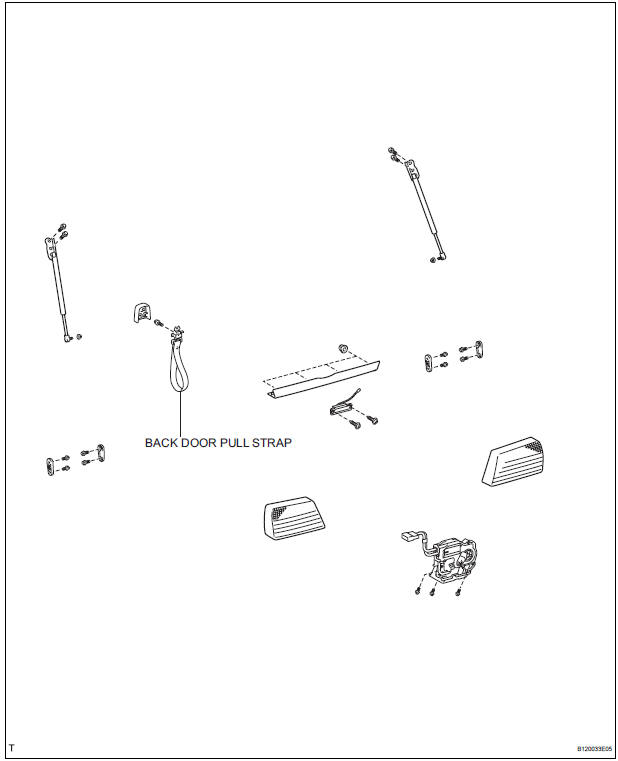
COMPONENTS
REMOVAL
1. REMOVE REAR WIPER ARM
- Remove the rear wiper arm head cap from the rear wiper arm.
- Remove the nut and the rear wiper arm.
2. REMOVE BACK DOOR GARNISH CENTER
3. REMOVE BACK DOOR SIDE GARNISH LH
4. REMOVE POWER BACK DOOR ROD
5. REMOVE BACK DOOR SIDE GARNISH RH
6. REMOVE BACK DOOR STRAP COVER
7. REMOVE BACK DOOR TRIM BOARD ASSEMBLY
8. REMOVE REAR WIPER MOTOR AND BRACKET ASSEMBLY
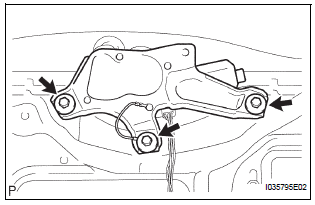
- Remove the 3 bolts.
- Disconnect the connector, and remove the rear wiper motor assembly.
INSPECTION
1. INSPECT REAR WIPER MOTOR AND BRACKET ASSEMBLY
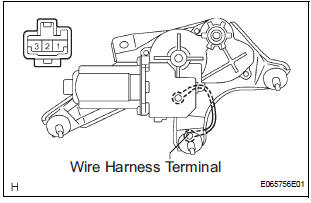
- Operation check
- Connect the battery (+) to the terminal 1 (+B) of the connector, the battery (-) to the terminal 3 (LS) of the connector and wire harness terminal of the rear wiper motor and bracket assembly, then check that the rear wiper motor and bracket operate.
- Automatic Stop Position Operation Check
- Connect the battery (+) to the terminal 1 (+B) of
the connector, the battery (-) to the terminal 3
(LS) of the connector and wire harness terminal
of the rear wiper motor and bracket assembly.
With the motor being rotated disconnect the terminal 3 (LS) from the battery (-), then check that the wiper motor stops automatically to the automatic stop position
INSTALLATION
1. INSTALL REAR WIPER MOTOR AND BRACKET ASSEMBLY
- Install the rear wiper motor assembly with the 3
bolts.
Torque: 5.5 N*m (56 kgf*cm, 49 in.*lbf)
- Connect the connector.
2. INSTALL REAR WIPER ARM
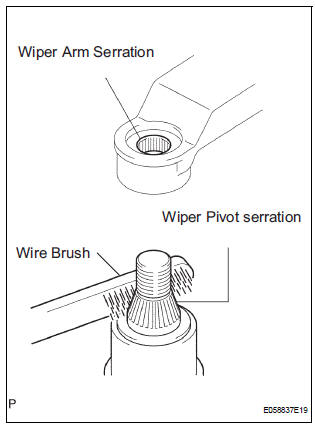
- Scrape off the serration part of the wiper arm with a round file or equivalent.
- Clean the rear wiper pivot serration with a brush.

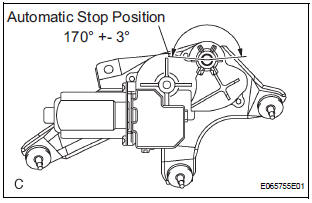
- Stop the rear wiper motor assembly to the automatic
stop position. Install the rear wiper arm to the
position as shown in the illustration.
Torque: 5.5 N*m (56 kgf*cm, 49 in.*lbf)
- Install the rear wiper arm head cap.
 Front wiper rubber
COMPONENTS
REMOVAL
1. REMOVE FRONT WIPER BLADE
Remove the front wiper blade from the front wiper
arm LH.
NOTICE:
Do not fold down the front wiper arm with the
front wiper blade ...
 Rear wiper rubber
COMPONENTS
REMOVAL
1. REMOVE REAR WIPER BLADE ASSEMBLY
Remove the rear wiper arm head cap from the rear
wiper arm.
Raise the rear wiper blade to the position as shown
i ...
Other materials:
Driving the vehicle
The following procedures should be observed to ensure safe
driving:
Starting the engine
Driving
With the brake pedal depressed, shift the shift lever to D.
Release the parking brake.
Gradually release the brake pedal and gently depress the accelerator
pedal to accelerate the vehicle.
...
Warning lights and
indicators
The warning lights and indicators on the instrument cluster and
center panel inform the driver of the status of the vehicle’s various
systems.
For the purpose of explanation, the following illustration displays
all warning lights and indicators illuminated.
Vehicles with monochrome displ ...
Vehicle Speed Sensor Malfunction
DTC P0500 Vehicle Speed Sensor Malfunction
DTC P0503 Vehicle Speed Sensor Circuit Malfunction
DESCRIPTION
The cruise control system uses the same vehicle speed signal that is sent to
the ECM for the SFI system.
If DTC P0500 is detected, perform the diagnosis using the inspection procedure
...
