Toyota Sienna Service Manual: Removal
HINT: Remove the RH side by the same procedure as the LH side.
1. REMOVE REAR WHEEL
2. DRAIN BRAKE FLUID
NOTICE: Wash the brake fluid off immediately if it attaches to any painted surface.
3. SEPARATE REAR BRAKE TUBE NO.4
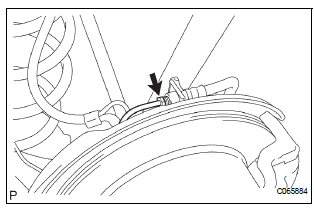
(a) Remove the clip and a disconnect, the rear brake flexible hose.
(b) Using SST and spanner loosen the rear brake tube No. 4.
SST 09023-00101
4. SEPARATE REAR LH FLEXIBLE HOSE
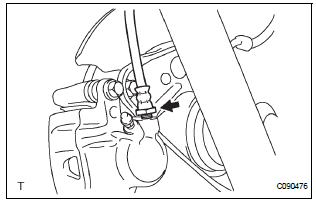
(a) Using SST, remove the rear brake flexible hose.
SST 09023-12701
5. REMOVE DISC BRAKE CYLINDER ASSEMBLY REAR LH
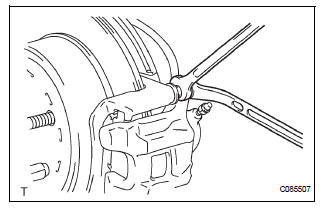
(a) Hold the rear disc brake cylinder slide pin and remove the 2 bolts.
(b) Remove the disc brake cylinder assembly rear LH from the rear disc brake cylinder mounting LH.
6. REMOVE REAR DISC BRAKE CYLINDER SLIDE PIN
(a) Remove the 2 rear disc brake cylinder slide pins from the rear disc brake cylinder mounting LH.
7. REMOVE REAR DISC BRAKE BUSH DUST BOOT
(a) Remove the 2 rear disc brake bush dust boots.
8. REMOVE DISC BRAKE PAD KIT REAR (PAD ONLY)
(a) Remove the disc brake pad kit rear.
9. REMOVE REAR DISC BRAKE ANTI SQUEAL SHIM KIT
(a) Remove the anti squeal shim No. 1 and anti squeal shim No. 2 from each pad.
10. REMOVE REAR DISC BRAKE PAD SUPPORT PLATE
(a) Remove the rear disc brake pad support plate (No.
1) and rear disc brake pad support plate (No. 2) from the rear disc brake cylinder mounting LH.
11. REMOVE REAR DISC BRAKE CYLINDER MOUNTING LH
(a) Remove the bolts and rear disc brake cylinder mounting LH.
 Rear disc brake
COMPONENTS
...
 Disassembly
1. REMOVE CYLINDER BOOT
(a) Using a screwdriver, remove the set ring and
cylinder boot.
2. REMOVE REAR DISC BRAKE PISTON
(a) Place a shop rug, between the rear disc brake
piston and the disc ...
Other materials:
Playing an audio CD and
MP3/WMA/AAC discs
Insert disc or select “CD” on the audio source selection screen
with a disc inserted to begin listening to a CD.
Audio control screen
Pressing the “AUDIO” button displays the audio control screen from
any screens of the selected source.
Audio source selection screen
appears
D ...
Adjustment
1. REMOVE REAR WHEEL
2. ADJUST PARKING BRAKE SHOE CLEARANCE (See
page PB-18)
3. INSTALL REAR WHEEL
Torque: 103 N*m (1,050 kgf*cm, 76 ft.*lbf)
4. INSPECT PARKING BRAKE PEDAL TRAVEL
(a) Slowly depress the parking brake pedal all the way,
and count the number of clicks.
Parking brake pedal trav ...
Checking tires
Check if the treadwear indicators are showing on the tires. Also check
the tires for uneven wear, such as excessive wear on one side of the
tread. Check the spare tire condition and pressure if not rotated.
New tread
Worn tread
Treadwear indicator
The location of treadwear indicator ...
