Toyota Sienna Service Manual: Removal
1. REMOVE FRONT FENDER LINER LH
2. REMOVE FRONT FENDER LINER RH
3. REMOVE FRONT BUMPER COVER
4. REMOVE FRONT BUMPER ENERGY ABSORBER
5. REMOVE FRONT BUMPER REINFORCEMENT SUBASSEMBLY
6. REMOVE LASER SENSOR
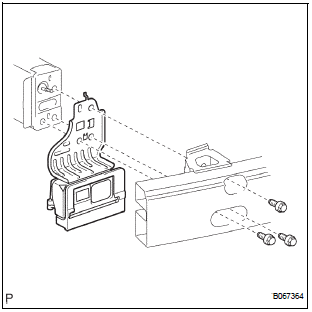
- Disconnect the connector and remove the laser the sensor.
 Laser sensor
COMPONENTS
...
 Adjustment
CAUTION:
Do not stare at the luminous portion of the laser
during adjustment. The intensity of the laser light is
low, but it may result in loss of sight.
If operation is not car ...
Other materials:
Installation
1. INSTALL STABILIZER BAR FRONT
2. INSTALL FRONT STABILIZER BAR BUSH NO.1
(a) Install the front stabilizer bar bush No. 1.
HINT:
Install the bushing to the outer side of the bushing
stopper on the stabilizer bar as shown in the
illustration.
4. INSTALL RACK & PINION POWER STEERING GEA ...
Operation flow
HINT:
Perform troubleshooting in accordance with the
procedures below. The following is an outline of basic
troubleshooting procedures. Confirm the troubleshooting
procedures for the circuit you are working on before
beginning troubleshooting.
VEHICLE BROUGHT TO WORKSHOP
CUSTOMER PR ...
On-vehicle inspection
1. CHECK SEAT HEATER CONTROL (WIRE HARNESS
SIDE)
Disconnect the connector from the seat heater
control.
Measure the voltage and resistance of each
terminal of the wire harness side connector.
Standard
If the result is not as specified, there may be a
malfunction on ...
