Toyota Sienna Service Manual: Removal
1. REMOVE REAR DOOR SCUFF PLATE
2. REMOVE REAR DOOR WEATHERSTRIP
3. REMOVE BACK DOOR WEATHERSTRIP
4. REMOVE BACK DOOR SCUFF PLATE
5. REMOVE FRONT QUARTER TRIM PANEL ASSEMBLY
- Remove the floor anchor cover.
- Remove the bolt and disconnect the No. 2 rear seat outer belt assembly on the floor anchor side.
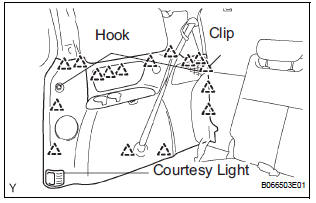
- Remove the 2 package holder net hooks.
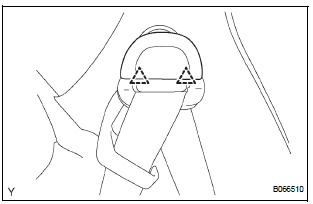
- Using a screwdriver, disengage the claw and remove the courtesy light.
- Disconnect the courtesy light connectors.
- Using a screwdriver, disengage the 16 clips and remove the quarter trim panel assembly.
HINT: Tape the screwdriver tip before use.
6. REMOVE REAR WINDOW SIDE GARNISH ASSEMBLY (0)
7. REMOVE NO. 1 REAR SEAT OUTER BELT ASSEMBLY (for 7-Passenger)
HINT: Refer to the instructions for disassembly of the rear No. 1 seat assembly (for captain seat type).
- Remove the rear seatback board RH.
- Remove the rear seat shoulder belt cover.
- Remove the bolt, nut and No. 1 rear seat outer belt assembly.
8. REMOVE 3 POINT TYPE REAR SEAT BELT ASSEMBLY (for 8-Passenger)
- Remove the nut and disconnect the 3 point type rear seat belt on the shoulder anchor side.
9. REMOVE NO. 2 REAR SEAT OUTER BELT ASSEMBLY
- Using a screwdriver, disengage the 2 claws and
remove the cover of the No. 2 rear seat outer belt
assembly on the shoulder anchor side.
HINT: Tape the screwdriver tip before use.
- Remove the bolt and disconnect the No. 2 rear seat outer belt assembly on the shoulder anchor side.
- Remove the bolt on the retractor side and remove the No. 2 rear seat outer belt assembly.
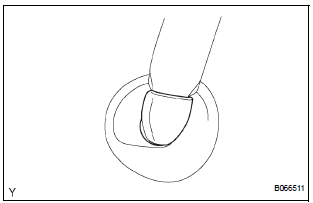
 Rear seat outer belt assembly
COMPONENTS
...
 Installation
1. INSTALL NO. 2 REAR SEAT OUTER BELT ASSEMBLY
NOTICE:
Do not disassemble the retractor.
Check the degree of tilt when the No. 2 rear seat
outer belt assembly begins to lock the ELR. ...
Other materials:
Registering a new contact to the contact list
New contact data can be registered. Up to 4 numbers per person can be
registered. For PBAP compatible Bluetooth® phones, this function is available
when “Automatic Transfer” is set to off.
Select “New Contact”.
Enter the name and select “OK”.
Enter the phone number and sele ...
Air Mix Damper Control Servo Motor Circuit (Driver Side)
DESCRIPTION
The air mix control servo motor (air mix damper servo sub-assembly) is
controlled by the A/C amplifier.
The air mix control servo motor moves the air mix damper by rotating (normal,
reverse) with electrical
power from the A/C amplifier.
This adjusts the mix ratio of the air t ...
Adjustment
HINT:
If the malfunction does not disappear by following the
procedure in ADJUSTMENT and the rear No. 2 seat
assembly needs to be replaced, do not disassemble the rear
No. 2 seat assembly.
1. ADJUST FRONT LEG
HINT:
Perform the following procedure if the inner leg does not
lock.
P ...
