Toyota Sienna Service Manual: Removal
1. REMOVE ROOF HEADLINING ASSEMBLY
2. REMOVE SLIDING ROOF SIDE GARNISH LH
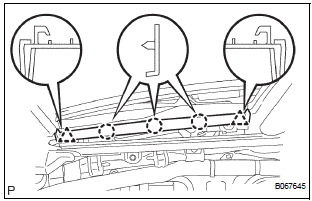
- Disengage the 3 claws.
- Disengage the rear clip.
- Disengage the front clip.
- Remove the slide garnish by pulling it rearward.
3. REMOVE SLIDING ROOF SIDE GARNISH RH
HINT: Use the same procedures described above for the LH side.
4. REMOVE SLIDING ROOF GLASS SUB-ASSEMBLY
- Using a torx wrench (T25), remove the 4 screws and sliding roof glass.
5. REMOVE SLIDING ROOF HOUSING ASSEMBLY
- Disconnect the 4 hoses and drive gear wire harness connector.
- Remove the 8 bolts and 4 brackets.
- Remove the 6 nuts and housing.
6. REMOVE SLIDING ROOF DRIVE GEAR SUBASSEMBLY
- Remove the 2 bolts and drive gear.
7. REMOVE SUNSHADE TRIM SUB-ASSEMBLY
8. REMOVE ROOF DRIP CHANNEL REAR
9. REMOVE SLIDING ROOF DRIVE CABLE LH
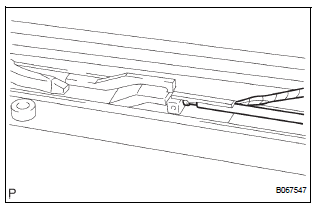
- Remove the 4 guide clips.
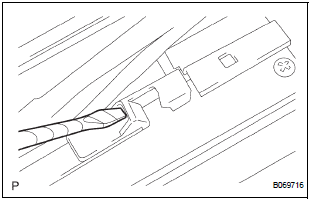
- Using a screwdriver, separate the link rod from the link holder, as shown in the illustration.
HINT: Tape the screwdriver tip before use
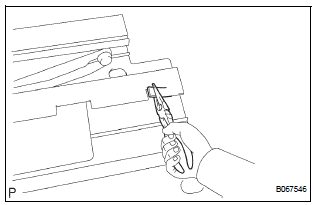
- Using long nose pliers, level the part indicated in the illustration.
- Pull out the deflector lifter link and drive cable together.
10. REMOVE SLIDING ROOF DRIVE CABLE RH
HINT: Use the same procedures described above for the LH side.
11. REMOVE ROOF WIND DEFLECTOR PANEL SUBASSEMBLY
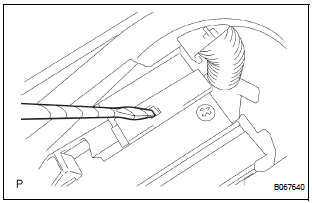
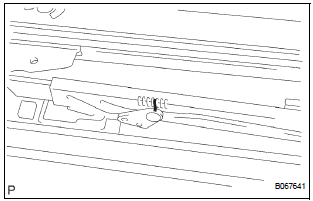
- Using a screwdriver, disengage the claw of the panel, as shown in the illustration.
HINT: Tape the screwdriver tip before use.
- Using a screwdriver, push hard the part indicated in the illustration to remove the panel.
HINT: Tape the screwdriver tip before use.
12. REMOVE SLIDING ROOF HOUSING PANEL
- Remove the 2 screws and housing panel.
13. ADJUST FULLY CLOSE POSITION
- Using a screwdriver, slide the drive cable of the sliding roof to align the matchmarks.
HINT: Tape the screwdriver tip before use.
 Sliding roof housing
COMPONENTS
...
 Installation
1. INSTALL SLIDING ROOF HOUSING ASSEMBLY
Install the housing with the 6 nuts.
Install the 4 brackets with the 8 bolts.
Connect the 4 hoses and drive gear connector.
2. ADJUST SLIDING ROOF G ...
Other materials:
Short to B+ in Rear Curtain Shield Squib LH
Circuit
DTC B1638/86 Short to B+ in Rear Curtain Shield Squib LH
Circuit
DESCRIPTION
The rear curtain shield squib LH circuit consists of the center airbag sensor
assembly and the curtain
shield airbag assembly LH.
The circuit instructs the SRS to deploy when deployment conditions are met.
DTC B ...
Replacing light bulbs
Headlight low beams (halogen bulb)
For left side only: Open the fuse box cover.
Unplug the connector while
pushing the lock release.
Turn the bulb base counterclockwise.
Install a new light bulb.
Align the 3 tabs on the light bulb
with the mounting, and insert.
...
Compressor Lock Sensor Circuit
DTC B1422/22 Compressor Lock Sensor Circuit
SYSTEM DESCRIPTION
The ECM sends an engine speed signal to the A/C amplifier via CAN
communication and BEAN
communication.
The A/C amplifier reads the difference between compressor speed and engine
speed. When the
difference becomes too large, t ...
