Toyota Sienna Service Manual: Removal
1. DISCONNECT CABLE FROM NEGATIVE BATTERY TERMINAL
2. REMOVE HEATED OXYGEN SENSOR (for Bank 1 Sensor 2) (See page EC-38)
3. REMOVE TAIL EXHAUST PIPE ASSEMBLY
(a) Remove the 2 bolts.
(b) Disconnect the 4 exhaust pipe supports and remove the tail exhaust pipe assembly.
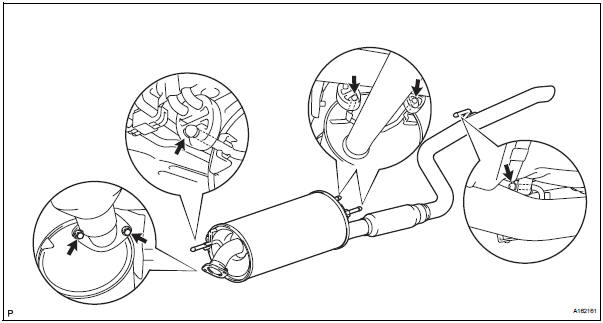
(c) Remove the gasket from the center exhaust pipe assembly.
4. REMOVE CENTER EXHAUST PIPE ASSEMBLY
(a) Remove the 2 bolts and 2 nuts.
(b) Disconnect the 2 exhaust pipe supports and remove the center exhaust pipe assembly.
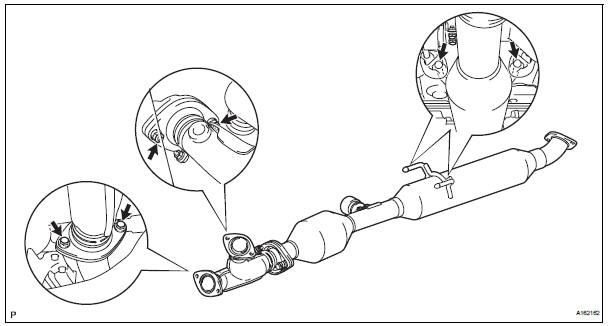
(c) Remove the gaskets from the center exhaust pipe assembly and the front exhaust pipe assembly.
5. REMOVE FRONT EXHAUST PIPE ASSEMBLY
(a) Disconnect the heated oxygen sensor (for bank 2 sensor 2) connector.
(b) Remove the 4 nuts and front exhaust pipe assembly.
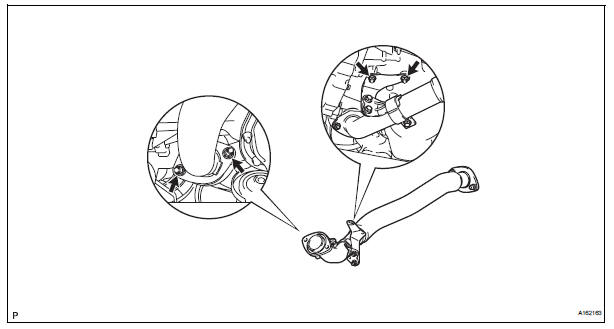
(c) Remove the gasket from the front exhaust pipe assembly.
6. REMOVE NO. 1 EXHAUST PIPE SUPPORT BRACKET
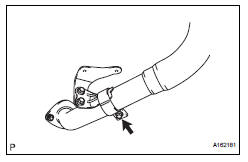
(a) Remove the bolt and No. 1 exhaust pipe support bracket.
7. REMOVE HEATED OXYGEN SENSOR (for Bank 2 Sensor 2) (See page EC-38)
 Exhaust pipe (for 4wd)
Components
...
 Installation
1. INSTALL HEATED OXYGEN SENSOR (for Bank 2
Sensor 2) (See page EC-39)
2. INSTALL FRONT EXHAUST PIPE ASSEMBLY
(a) Install a new gasket to the front exhaust pipe
assembly.
(b) Install the front ...
Other materials:
Screen for general settings
Press the ŌĆ£SETUPŌĆØ button.
Select ŌĆ£GeneralŌĆØ on the ŌĆ£SetupŌĆØ
screen.
Select to adjust the clock.
ŌĆ£EnglishŌĆØ, ŌĆ£FrançaisŌĆØ or
ŌĆ£EspañolŌĆØ can be selected.
On/off can be selected to
sound beeps.
Select to change the screen
color.
Select ...
Transfer
SST
RECOMMENDED TOOLS
EQUIPMENT
LUBRICANT
SSM
...
Setup menu
You can adjust the audio system to your desired settings.
Display ŌĆ£SetupŌĆØ screen
Press the ŌĆ£SETUPŌĆØ button to display the ŌĆ£SetupŌĆØ screen.
Select to adjust the settings for operation sounds, screen animation,
etc.
Select to set the voice settings.
Select to adjust th ...
