
Toyota Sienna Service Manual: Sound Signal Circuit between Video Terminal and Television Display
DESCRIPTION
This is the sound signal circuit from the video (video adapter) terminal to the television display assembly.
WIRING DIAGRAM
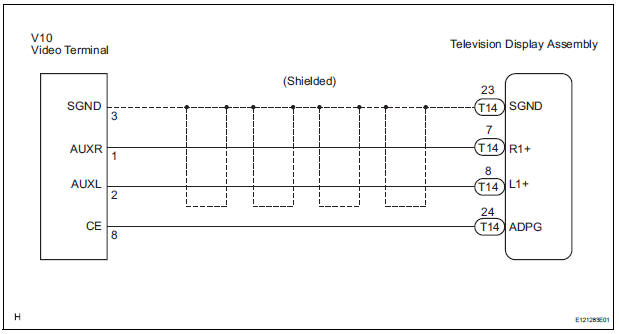
INSPECTION PROCEDURE
1 CHECK HARNESS AND CONNECTOR (TELEVISION DISPLAY ASSEMBLY - VIDEO TERMINAL)
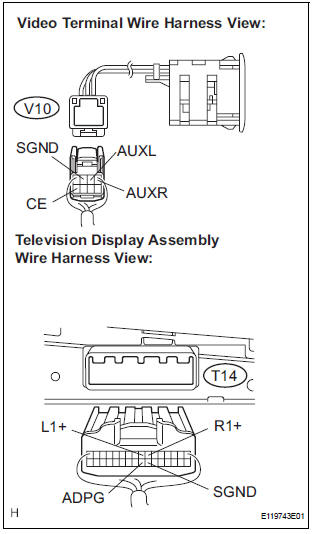
- Disconnect the connectors from the video (video adapter) terminal and television display assembly.
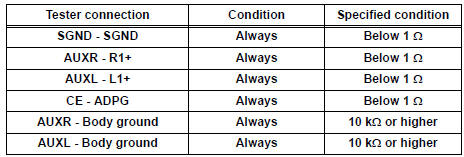
- Measure the resistance according to the value(s) in the table below.
Standard resistance
2 INSPECT VIDEO TERMINAL
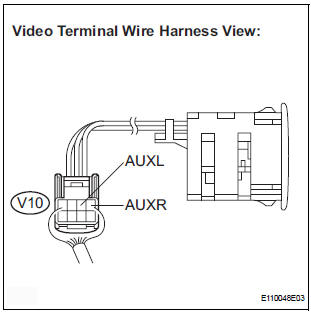
- Reconnect the video (video adapter) terminal connector.
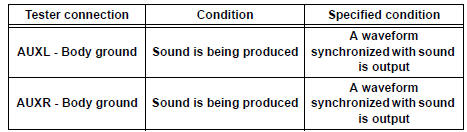
- Using an oscilloscope, check the signal waveform between each terminal and body ground according to the conditions, as shown in the chart.
HINT: An external device system is playing (When the video (video adapter) terminal is used).
Signal waveform
PROCEED TO NEXT CIRCUIT INSPECTION SHOWN IN PROBLEM SYMPTOMS TABLE
 A Remote Control System does not Operate
INSPECTION PROCEDURE
1 CHECK SYSTEM
Check that the remote control operation of the rear
system is not locked by the radio receiver or the radio
and navigation assembly.
Check ...
 Display Signal Circuit between Video Terminal and Television Display
DESCRIPTION
This is the display signal circuit from the video terminal to the television
display assembly.
WIRING DIAGRAM
INSPECTION PROCEDURE
1 CHECK HARNESS AND CONNECTOR (TELEVISION DISPL ...
Other materials:
Indicator Circuit
DESCRIPTION
The indicator displays the location of the obstacle and the approximate
distance between the vehicle and
the obstacle either by blinking or turning on.
WIRING DIAGRAM
INSPECTION PROCEDURE
1 CHECK HARNESS AND CONNECTOR (CLEARANCE WARNING ECU - AIR CONDITIONER
AMPLIFIER)
...
Removal
1. REMOVE INSTRUMENT CLUSTER CENTER NO. 1 FINISH PANEL
2. REMOVE INSTRUMENT CLUSTER CENTER NO. 2
FINISH PANEL
3. REMOVE SHIFT LEVER KNOB SUB-ASSEMBLY
4. REMOVE POSITION INDICATOR HOUSING ASSEMBLY
5. REMOVE INSTRUMENT CLUSTER CENTER LOWER FINISH PANEL SUB-ASSEMBLY
6. REMOVE POWER POINT SOCKET A ...
System description
1. POWER MIRROR CONTROL SYSTEM DESCRIPTION
This system has these functions: automatic glare-resistant
electrochromic (EC) mirror, electrical remote control type
mirror, memory function, foot light function, and rear
window defogger-linked mirror defogger.
2. FUNCTION OF MAIN COMPONENT
...
