Toyota Sienna Service Manual: Removal
1. REMOVE FRONT WHEELS
2. REMOVE FRONT STABILIZER LINK ASSEMBLY LH
HINT: (See page SP-26)
3. REMOVE FRONT STABILIZER LINK ASSEMBLY RH
HINT: Remove the RH side by the same procedures as the LH side.
4. REMOVE CENTER EXHAUST PIPE ASSEMBLY
HINT: (See page EX-8)
5. REMOVE NO. 1 FRONT STABILIZER BRACKET LH
(a) Remove the 2 bolts, the front stabilizer bracket No.1 LH and the front stabilizer bracket No.2 LH.
6. REMOVE NO. 1 FRONT STABILIZER BRACKET RH
HINT: Remove the RH side by the same procedures as the LH side.
7. SEPARATE TIE ROD ASSEMBLY LH
HINT: (See page AH-4) SST 09628-62011
8. SEPARATE TIE ROD ASSEMBLY RH
SST 09628-62011
HINT: Remove the RH side by the same procedures as the LH side.
9. SEPARATE PRESSURE FEED TUBE ASSEMBLY
HINT: (See page PS-21) SST 09023-12701
10. SEPARATE STEERING INTERMEDIATE SHAFT ASSEMBLY
HINT: (See page PS-21)
11. REMOVE RACK & PINION POWER STEERING GEAR ASSEMBLY
HINT: (See page PS-21)
12. REMOVE MANIFOLD STAY
HINT: (See page EM-39)
13. REMOVE EXHAUST MANIFOLD SUB-ASSEMBLY RH
HINT: (See page EM-37)
14. REMOVE NO. 1 FRONT STABILIZER BAR BUSHING
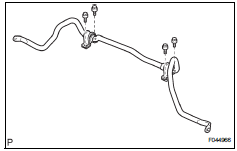
15. REMOVE FRONT STABILIZER BAR
 Front stabilizer bar (for 4wd)
COMPONENTS
...
 Inspection
1. INSPECT FRONT STABILIZER LINK ASSEMBLY LH
(a) As shown in the illustration, flip the ball joint stud
back and forth 5 times, before installing the nut.
(b) Using a torque wrench, turn the nut ...
Other materials:
Mirror Switch Circuit
DESCRIPTION
A switch signal of the outer mirror switch is transmitted to the
selected outer mirror control ECU by way
of the body ECU. Then, the outer mirror control ECU activates the mirror
motor to move the mirror UP,
DOWN, RIGHT and LEFT in response to the inputs.
HINT:
Th ...
Installation
1. INSTALL TIRE PRESSURE WARNING RESET SWITCH
(a) Engage the 2 claws to install the tire pressure
warning reset switch to the lower instrument panel
finish panel sub-assembly LH.
2. INSTALL LOWER INSTRUMENT PANEL FINISH
PANEL SUB-ASSEMBLY LH
3. INSTALL COWL SIDE TRIM SUB-ASSEMBLY LH
4. IN ...
Reassembly
1. INSTALL REAR DOOR WIRE SUB-ASSEMBLY LH
Install the wire.
NOTICE:
When installing the wire, push the areas where
the clips are installed in order to prevent
damage and deformation.
Install the 2 screws
2. INSTALL REAR DOOR LOCK ASSEMBLY LH
Apply MP grease to the slidin ...
