Toyota Sienna Service Manual: Removal
1. REMOVE BATTERY
2. REMOVE AIR CLEANER ASSEMBLY
HINT: (See page EM-26)
3. SEPARATE TRANSMISSION CONTROL CABLE ASSEMBLY
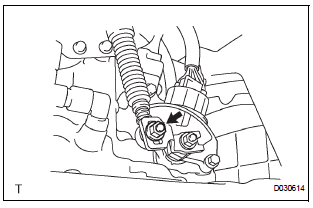
(a) Remove the nut from the control shaft lever.
(b) Disconnect the control cable from the control shaft lever.
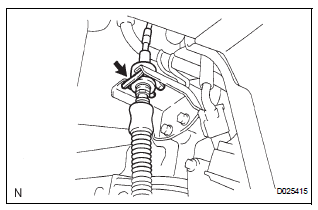
(c) Remove the clip and disconnect the control cable from the control cable bracket.
NOTICE: Do not hold the resin guide pipe.
4. REMOVE PARK/NEUTRAL POSITION SWITCH ASSEMBLY

(a) Disconnect the park/neutral position switch connector.
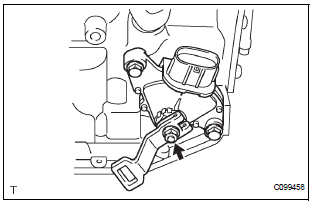
(b) Remove the nut, washer and control shaft lever
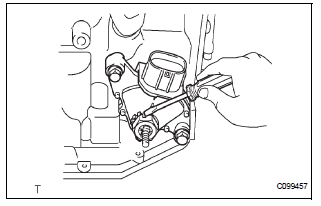
(c) Using a screwdriver, pry up the lock plate.
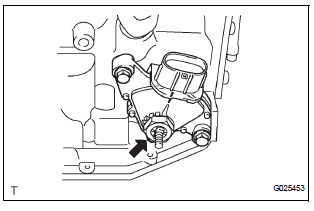
(d) Remove the lock nut and the lock plate.
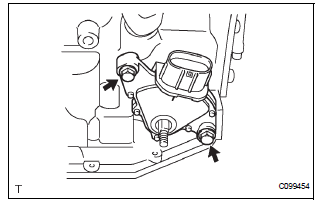
(e) Remove the 2 bolts and pull out the park/neutral position switch.
 Park / neutral position switch
Components
...
 Inspection
1. INSPECT PARK/NEUTRAL POSITION SWITCH ASSEMBLY OPERATION
(a) Apply the parking brake and turn the ignition switch
to the ON position.
(b) Depress the brake pedal and check that the engine
star ...
Other materials:
Disassembly
1. Remove rear wheel
2. Drain brake fluid
Notice:
wash the brake fluid off immediately if it attaches to
any painted surface.
3. REMOVE REAR BRAKE DRUM SUB-ASSEMBLY
(a) Release the parking brake lever, and remove the
rear brake drum.
HINT:
If the rear brake drum cannot be removed easily,
p ...
Power back door drive unit
INSPECTION
1. INSPECT POWER BACK DOOR DRIVE UNIT
Remove the unit.
Apply battery voltage to the terminals and check the
motor operation.
Standard
If the result is not as specified, replace the drive
unit.
Check the resistance of the clutch terminals.
Resistance
If th ...
Diagnosis system
1. CHECK DLC3
(a) The vehicle's ECM uses the ISO 15765-4 for
communication. The terminal arrangement of the
DLC3 complies with SAE J1962 and matches the
ISO 15765-4 format.
HINT:
Connect the cable of the intelligent tester to the
DLC3, turn the ignition switch to the ON position
and atte ...
