Toyota Sienna Service Manual: Installation
1. INSTALL POWER POINT SOCKET ASSEMBLY
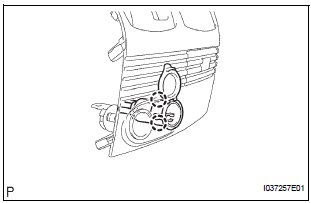
- Engage the 2 claws to install the power point socket assembly.
2. INSTALL INSTRUMENT CLUSTER CENTER LOWER FINISH PANEL SUB-ASSEMBLY
3. INSTALL POSITION INDICATOR HOUSING ASSEMBLY
4. INSTALL SHIFT LEVER KNOB SUB-ASSEMBLY
5. INSTALL INSTRUMENT CLUSTER CENTER NO. 2 FINISH PANEL
6. INSTALL INSTRUMENT CLUSTER CENTER NO. 1 FINISH PANEL
 Removal
1. REMOVE INSTRUMENT CLUSTER CENTER NO. 1 FINISH PANEL
2. REMOVE INSTRUMENT CLUSTER CENTER NO. 2
FINISH PANEL
3. REMOVE SHIFT LEVER KNOB SUB-ASSEMBLY
4. REMOVE POSITION INDICATOR HOUSING ASSEMBLY
...
 Power point socket (for Rear Side)
COMPONENTS
...
Other materials:
Dtc check / clear
1. DTC CHECK/CLEAR (WHEN USING INTELLIGENT TESTER):
(a) DTC check
(1) Connect the intelligent tester to the DLC3.
(2) Turn the ignition switch to the ON position.
(3) Read the DTCs following the prompts on the
tester screen.
(b) DTC clear
(1) Connect the intelligent tester to the DLC3 ...
Installation
1. INSTALL FRONT SEAT ASSEMBLY LH
Place the seat assembly in the cabin.
NOTICE:
Be careful not to damage the body.
Connect the connectors under the seat assembly.
Tighten the 2 bolts on the front side of the seat
assembly.
Torque: 37 N*m (375 kgf*cm, 27 ft.*lb ...
Removal
1. PRECAUTION
CAUTION:
Be sure to read "PRECAUTION" thoroughly before
servicing.
2. DISCONNECT CABLE FROM NEGATIVE BATTERY
TERMINAL
CAUTION:
Wait for 90 seconds after disconnecting the cable to
prevent the airbag working.
3. REMOVE INSTRUMENT PANEL FINISH PANEL SUBASSEMBLY LOWER L ...
