Toyota Sienna Service Manual: Disassembly
1. REMOVE STOP LIGHT SWITCH ASSEMBLY
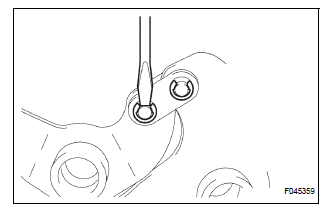
(a) Turn the stop light switch assembly counterclockwise and remove the stop light switch assembly.
(b) Remove the stop light switch mounting adjuster from the brake pedal support sub-assembly.
2. REMOVE STOP LIGHT SWITCH CUSHION
(a) Remove the stop light switch cushion from the brake pedal sub-assembly.
3. REMOVE BRAKE PEDAL
(a) Remove the 2 brake pedal shafts, 2 nuts and brake pedal from the brake pedal support sub-assembly.
4. REMOVE BRAKE PEDAL BUSH
(a) Remove the 4 brake pedal bushes from the brake pedal.
5. REMOVE BRAKE PEDAL SHAFT COLLAR
(a) Remove the 2 brake pedal shaft collars from the brake pedal.
6. REMOVE PUSH ROD PIN
(a) Using a screwdriver, remove the 2 E-rings, 2 push rod pins and 2 plates from the brake pedal.
(b) Remove the 2 push rod bushes.
7. REMOVE BRAKE PEDAL PAD
(a) Remove the brake pedal pad to the brake pedal sub-assembly.
 Removal
1. SEPARATE BATTERY NEGATIVE TERMINAL
2. REMOVE FRONT DOOR SCUFF PLATE LH
3. REMOVE COWL SIDE TRIM BOARD LH
4. REMOVE INSTRUMENT PANEL FINISH PANEL SUBASSEMBLY
LOWER LH
(a) Remove the 2 bolts and ...
 Reassembly
1. INSTALL BRAKE PEDAL PAD
(a) Install the brake pedal pad to the brake pedal subassembly.
2. INSTALL PUSH ROD PIN
(a) Apply lithium soap base glycol grease to inside
surface of 2 new push rod bus ...
Other materials:
Installation
1. Connect inlet sub-assembly
(a) Connect the inlet hose to the radiator.
(b) Install the inlet sub-assembly to the radiator with the
bolt.
Torque: 7.1 N*m (72 kgf*cm, 63 in.*lbf)V
2. Install no. 2 Radiator support
(A) install the no. 2 Radiator support to the radiator with
the 2 ...
Manual Up / Down and Auto Down Function does not Operate on
Driver Side
DESCRIPTION
If the manual UP/DOWN function does not operate, no power may be supplied to
the power window
master switch or the power window motor. The power window master switch itself
or the wire harness may
be malfunctioning.
WIRING DIAGRAM
INSPECTION PROCEDURE
1 INSPECT FUSE (P/W)
...
Voice Recognition Difficulty
INSPECTION PROCEDURE
1 CHECK CONDITION
Check if the system's voice recognition level is low by
using only one particular voice.
OK:
System's voice recognition level is low with any
voice.
2 CHECK MAP DISC
Check that the map disc is not deformed or cracked.
OK:
No deformation ...
