Toyota Sienna 2010-2026 Owners Manual: Checking and replacing fuses
If any of the electrical components do not operate, a fuse may have blown. If this happens, check and replace the fuses as necessary.
- Turn the engine switch to the “LOCK” position (vehicles without a smart key system) or off (vehicles with a smart key system).
- Open the fuse box cover.
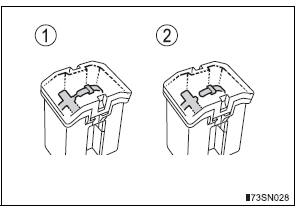
- Engine compartment
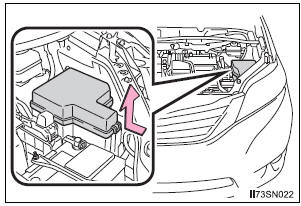
Push the tab in and lift the lid off.
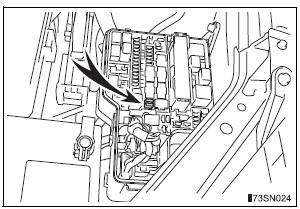
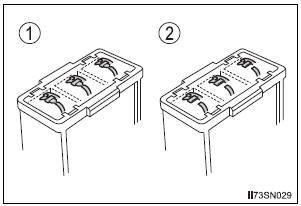
- Driver’s side instrument panel
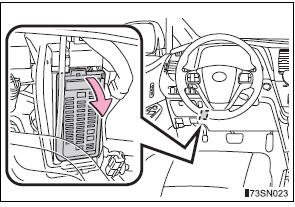
Remove the lid
- Remove the fuse.
Only type A fuses can be removed using the pullout tool.
- Check if the fuse has blown.
- Normal fuse
- Blown fuse
Type A and B
Replace the blown fuse with a new fuse of an appropriate amperage rating. The amperage rating can be found on the fuse box lid.
Type C, D and E
Contact your Toyota dealer.
- Type A
- Type B
- Type C
- Type D
- Type E
After a fuse is replaced
- If the lights do not turn on even after the fuse has been replaced, a bulb may need replacement.
- If the replaced fuse blows again, have the vehicle inspected by your Toyota dealer.
If there is an overload in the circuit
The fuses are designed to blow, protecting the wiring harness from damage.
When replacing light bulbs
Toyota recommends that you use genuine Toyota products designed for this vehicle. Because certain bulbs are connected to circuits designed to prevent overload, non-genuine parts or parts not designed for this vehicle may be unusable.
| WARNING To prevent system breakdowns and vehicle fire Observe the following precautions. Failing to do so may cause damage to the vehicle, and possibly a fire or injury.
|
| NOTICE Before replacing fuses Have the cause of electrical overload determined and repaired by your Toyota dealer as soon as possible. |
 Wireless remote control/
electronic key battery
Wireless remote control/
electronic key battery
Replace the battery with a new one if it is depleted.
You will need the following items:
Flathead screwdriver
Lithium battery CR2032
Replacing the battery
Vehicles without a smart key sy ...
 Light bulbs
You may replace the following bulbs by yourself. The difficulty
level of replacement varies depending on the bulb. If necessary
bulb replacement seems difficult to perform, contact your Toyota
deal ...
Other materials:
Checking monitor status
The purpose of the monitor result (mode 06) is to allow
access to the results for on-board diagnostic monitoring tests
of specific components/systems that are not continuously
monitored. Examples are catalyst, evaporative emission
(EVAP) and thermostat.
The monitor result allows the OBD II sc ...
On-vehicle inspection
1. INSPECT COOLER CONDENSER CORE
(a) If the fin of the cooler condenser core is dirty, clean
it with water and dry it with compressed air.
NOTICE:
Do not damage the fin of the cooler condenser
core.
(b) If the fin of the cooler condenser core is bent, make
it straight using a screwdriver or p ...
Wiper Signal Circuit
DESCRIPTION
The distance control ECU detects wiper operation. If the windshield wipers
operate in the HI or LO mode,
the cruise control is canceled and the warning sound "pong" is emitted once. In
addition, the following
warnings will continue until the cruise control main switch is ...
