
Toyota Sienna Service Manual: Installation
HINT: Install the RH side by the same procedures with LH side.
1. INSTALL FRONT SPEED SENSOR LH
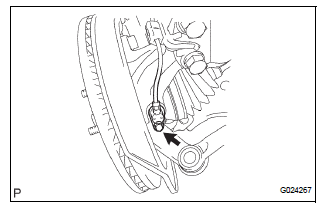
(a) Install the speed sensor front LH with the bolt.
Torque: 8.0 N*m (82 kgf*cm, 71 in.*lbf)
NOTICE: Keep the tip of the front speed sensor LH.
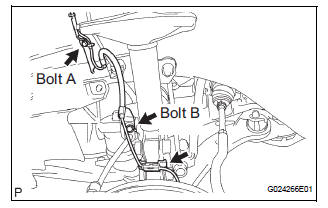
(b) Install the sensor harness clamps with the 2 bolts A and B to the body and shock absorber.
Torque: Bolt A 8.0 N*m (82 kgf*cm, 71 in.*lbf)
Bolt B 19 N*m (192 kgf*cm, 14 ft.*lbf)
NOTICE: Do not twist the sensor wire when installing the sensor.
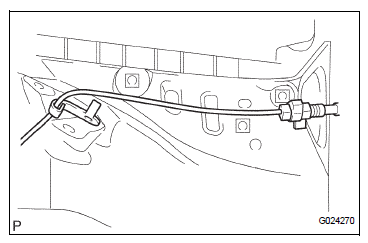
(c) Connect the clamp to the knuckle.
(d) Install the sensor harness and clamp to the body.
(e) Connect the speed sensor connector.
2. INSTALL FRONT FENDER LINER LH
3. REMOVE FRONT WHEEL Torque: 103 N*m (1,050 kgf*cm, 76 ft.*lbf)
4. CHECK ABS SPEED SENSOR SIGNAL
HINT: See page BC-3
 Inspection
1. INSPECT FRONT SPEED SENSOR
(a) Make sure that there is no looseness at the
connector lock part and connecting part of the
connector.
(b) Disconnect the speed sensor connector.
(c) Measure ...
 Rear speed sensor (for 2wd)
Components
...
Other materials:
Television Display Power Source Circuit
DESCRIPTION
This is the power source circuit to operate the television display assembly.
WIRING DIAGRAM
INSPECTION PROCEDURE
1 INSPECT TELEVISION DISPLAY ASSEMBLY
Disconnect the connector from the television display
assembly.
Measure the resistance according to the value(s) ...
Inspection
1. INSPECT GARAGE DOOR OPENER
Press the switch and check that each red LED turns
on. If one or more of the switches does not turn on
the LED, confirm normal operation of the fuse and
wire harness, then replace the garage door opener.
2. INSPECT GARAGE DOOR OPENER REGISTRATION ...
Short to B+ in Rear Curtain Shield Squib LH
Circuit
DTC B1638/86 Short to B+ in Rear Curtain Shield Squib LH
Circuit
DESCRIPTION
The rear curtain shield squib LH circuit consists of the center airbag sensor
assembly and the curtain
shield airbag assembly LH.
The circuit instructs the SRS to deploy when deployment conditions are met.
DTC B ...
