
Toyota Sienna Service Manual: Installation
1. INSTALL ECM
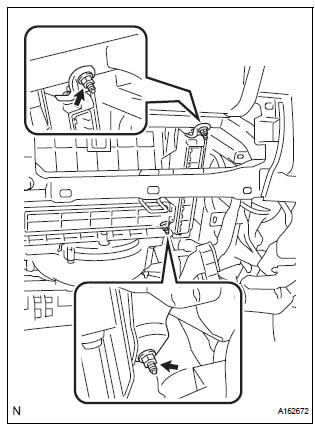
- Install the ECM with the 2 nuts.
Torque: 5.5 N*m (56 kgf*cm, 49 in.*lbf)
- Connect the 5 ECM connectors.
2. INSTALL ECM (with 10 speakers system)
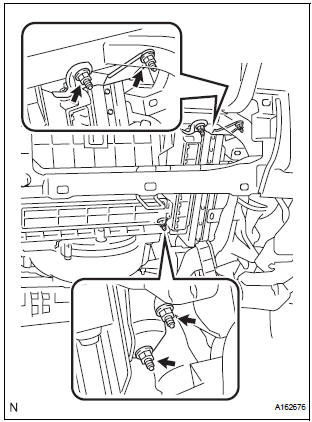
- Install the ECM and stereo components amplifier
with the 4 nuts.
Torque: 5.5 N*m (56 kgf*cm, 49 in.*lbf)
- Connect the 5 ECM connectors and 2 stereo components amplifier connectors.
3. INSTALL NO. 2 INSTRUMENT PANEL BOX
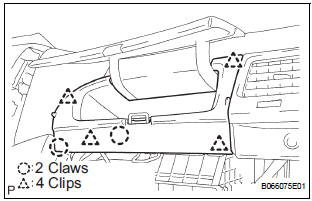
- Install the No. 2 instrument panel box.
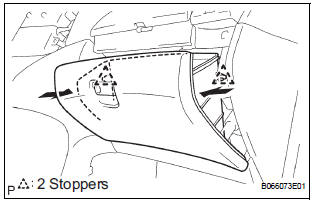
4. INSTALL GLOVE COMPARTMENT DOOR ASSEMBLY
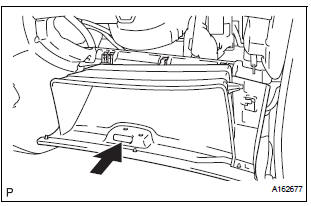
- Install the glove compartment door sub-assembly frontward to install it.
- Push the right side wall and then push the left wall to install the stoppers.
5. PERFORM REGISTRATION
- When replacing the ECM, perform distance control ECU recognition in ECM
 Removal
1. REMOVE GLOVE COMPARTMENT DOOR ASSEMBLY
Push the right side wall and then push the left wall
to release the stoppers.
Pull the glove compartment door sub-assembly
rearwar ...
 Accelerator pedal rod
COMPONENTS
...
Other materials:
Components
REMOVAL
1. DISCONNECT CABLE FROM NEGATIVE BATTERY
TERMINAL
2. REMOVE FRONT BUMPER ASSEMBLY
3. REMOVE FOG LIGHT ASSEMBLY
Disengage the 2 claws
Disengage the 2 pins and remove the fog light
assembly.
DISASSEMBLY
1. REMOVE FOG LIGHT BULB
Turn in the dir ...
Security Horn Circuit
DESCRIPTION
During the alarm sounding state, the relay in the ECU turns on and off in a
cycle of approximately 0.2
seconds, causing the security horn to sound.
WIRING DIAGRAM
INSPECTION PROCEDURE
1 INSPECT SECURITY HORN ASSEMBLY
Disconnect the T1 security horn connector.
C ...
Power Slide Door RH does not Operate When Using Inside / Outside
Handle
DESCRIPTION
The inside / outside handles have the ability to control operation
of the power slide door. Pulling either
handle transmits a request signal to the power slide door ECU RH, which then
commands the power
slide door control motor and clutch to open / close the power sli ...
