Toyota Sienna Service Manual: Rear center seat outer belt assembly
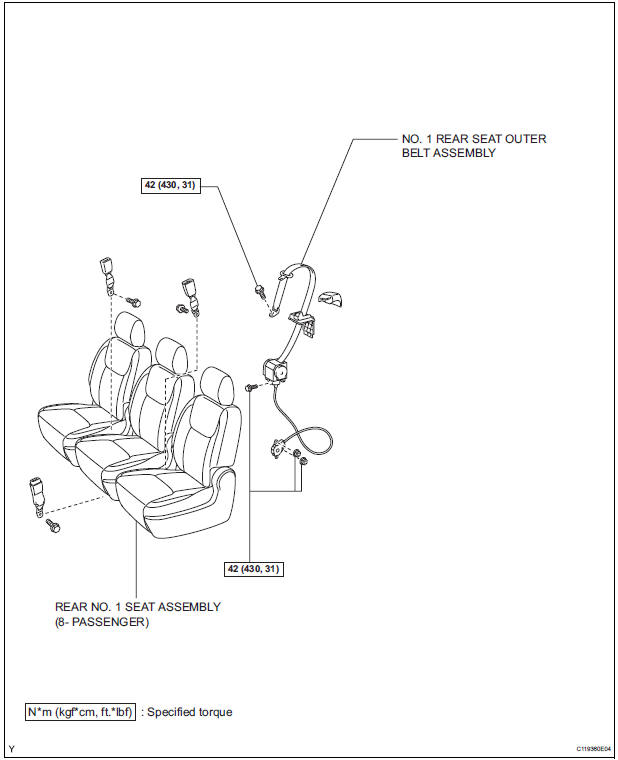
COMPONENTS
 Installation
1. INSTALL CENTER REAR SEAT LAP TYPE BELT
ASSEMBLY (for 8-Passenger)
HINT:
Refer to the instructions for reassembly of the rear No. 1 seat assembly (for
center seat).
Install the center ...
 Removal
1. REMOVE NO. 1 REAR SEAT OUTER BELT
ASSEMBLY (for 8-Passenger)
HINT:
Refer to the instructions for disassembly of the rear No .1 seat assembly (for
center seat).
Remove the rear seatba ...
Other materials:
Lost Communication with Radar Sensor
DTC U1102 Lost Communication with Radar Sensor
DESCRIPTION
The laser sensor and distance control ECU transmit the data for general
vehicle control and diagnosis
function along the communication line. The distance control ECU determines the
curve radius information
based on signals from the s ...
Disassembly
1. REMOVE RH SEAT REAR SEAT RECLINING COVER
Remove the 2 screws.
Remove the RH seat rear seat reclining cover by
pulling it out in the arrow mark direction shown in
the illustration.
2. REMOVE LH SEAT REAR SEAT RECLINING COVER
Remove the 2 screws.
R ...
Installation
1. INSTALL TIRE PRESSURE WARNING RESET SWITCH
(a) Engage the 2 claws to install the tire pressure
warning reset switch to the lower instrument panel
finish panel sub-assembly LH.
2. INSTALL LOWER INSTRUMENT PANEL FINISH
PANEL SUB-ASSEMBLY LH
3. INSTALL COWL SIDE TRIM SUB-ASSEMBLY LH
4. IN ...
