
Toyota Sienna 2010-2026 Owners Manual: Replacing light bulbs
Headlight low beams (halogen bulb)
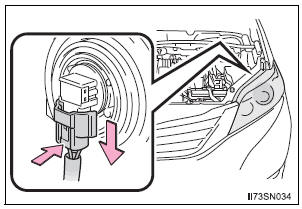
- For left side only: Open the fuse box cover.
- Unplug the connector while pushing the lock release.
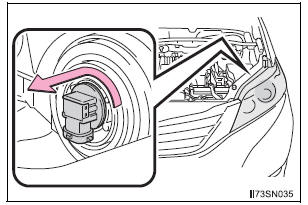
- Turn the bulb base counterclockwise.
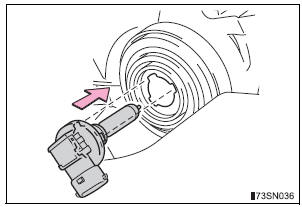
- Install a new light bulb.
Align the 3 tabs on the light bulb with the mounting, and insert.
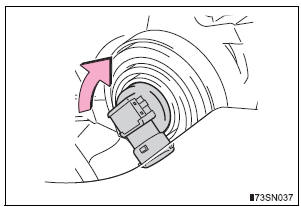
- Turn and secure the bulb base.
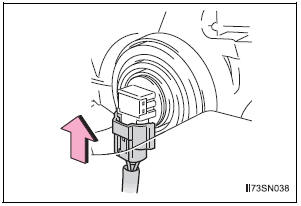
- Install the connector.
Shake the bulb base gently to check that it is not loose, turn the headlights on once and visually confirm that no light is leaking through the mounting.
- For left side only: Install the fuse box cover.
Headlight high beams and bulb type daytime running lights (if equipped)
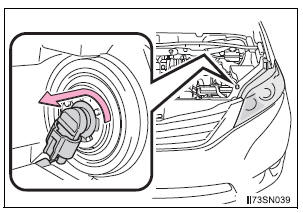
- For left side only: Open the fuse box cover.
- Turn the bulb base counterclockwise.
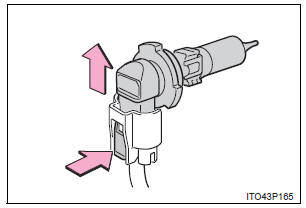
- Unplug the connector while pushing the lock release.
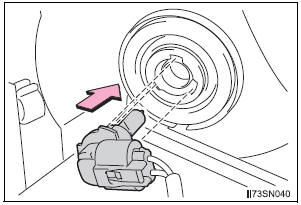
- Install a new light bulb.
Align the 3 tabs on the light bulb with the mounting, and insert.
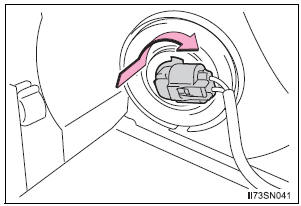
- Turn and secure the bulb
base.
Shake the bulb base gently to check that it is not loose, turn the headlights on once and visually confirm that no light is leaking through the mounting.
- For left side only: Install the fuse box cover.
Fog lights (if equipped)
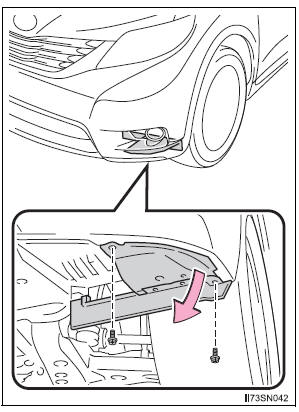
- Remove the engine under cover bolt and pull down the engine under cover.
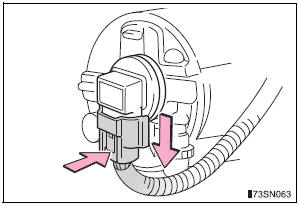
- Unplug the connector while pushing the lock release
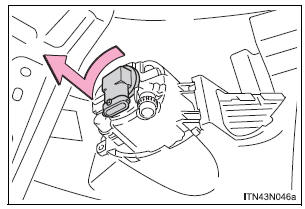
- Turn the bulb base counterclockwise.
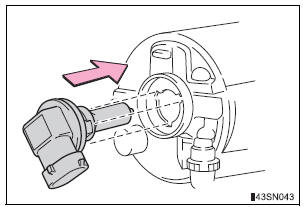
- Install a new light bulb.
Align the 3 tabs on the light bulb with the mounting and insert.
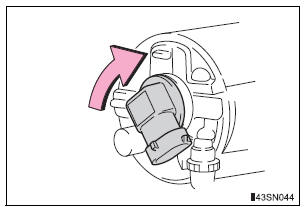
- Turn clockwise and secure the bulb base.
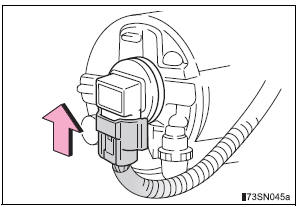
- Install the connector.
Shake the connector gently to check that it is not loose, turn the fog lights on once and visually confirm that no light is leaking through the mounting.
- When installing the engine under cover, reverse the step 1.
Front turn signal/parking and front side marker lights (vehicles without daytime running lights or with bulb type daytime running lights)
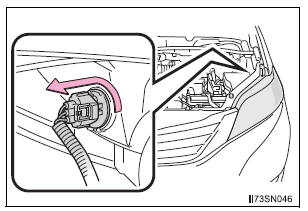
- For left side only: Open the fuse box cover.
- Turn the bulb base counterclockwise.
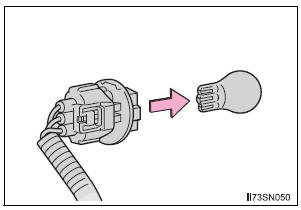
- Remove the light bulb.
Front turn signal lights (vehicles with LED type daytime running lights)
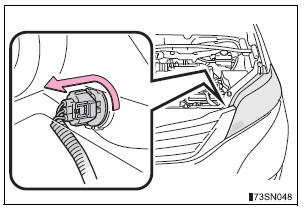
- For left side only: Open the fuse box cover.
- Turn the bulb base counterclockwise.
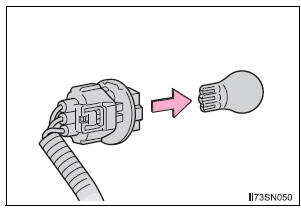
- Remove the light bulb.
Front side marker lights (vehicles with LED type daytime running lights)
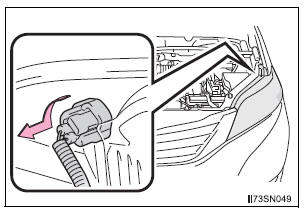
- For left side only: Open the fuse box cover.
- Turn the bulb base counterclockwise.
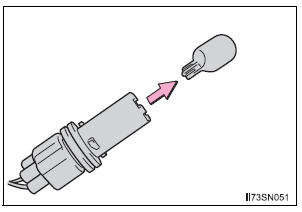
- Remove the light bulb.
Rear turn signal lights (vehicles with LED type stop/tail lights)
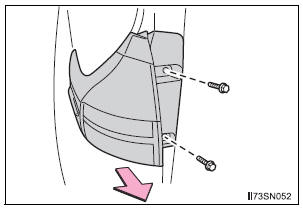
- Remove the securing bolts and remove the unit.
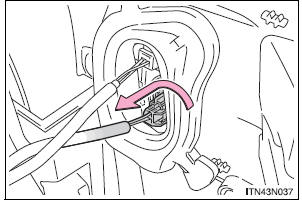
- Turn the bulb base counterclockwise.
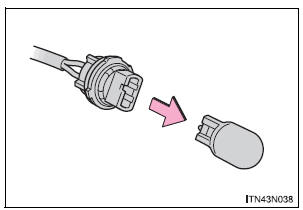
- Remove the light bulb.
Rear turn signal lights and stop/tail lights (vehicles with bulb type stop/tail lights)
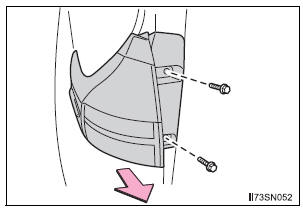
- Remove the securing bolts and remove the unit.
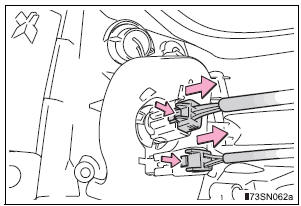
- Unplug the connector while pushing the lock release
- Turn the bulb base counterclockwise.
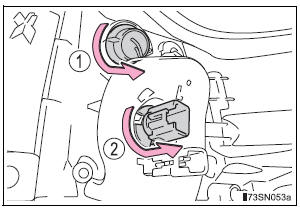
- Rear turn signal lights
- Stop/tail lights
- Remove the light bulb.
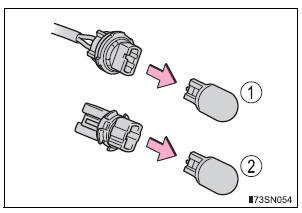
- Rear turn signal lights
- Stop/tail lights
Tail and back-up lights
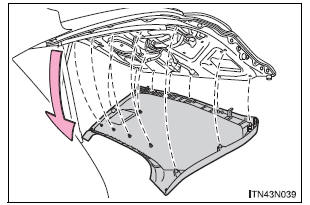
- Remove the back door trim board.
- Turn the bulb base counterclockwise.
- Vehicles with bulb type stop/tail lights
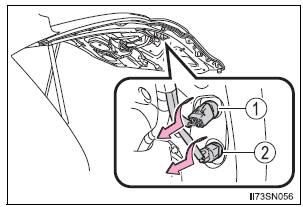
- Back-up light
- Tail light
- Vehicles with LED type stop/tail lights
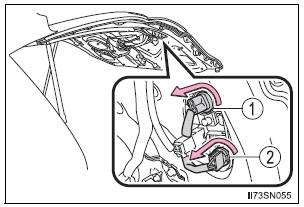
- Tail light
- Back-up light
- Remove the light bulb
- Vehicles with bulb type stop/tail lights
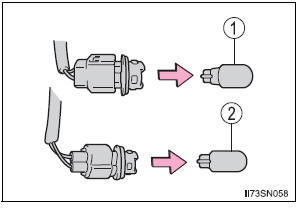
- Back-up light
- Tail light
- Vehicles with LED type stop/tail lights
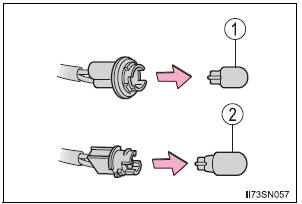
- Tail light
- Back-up light
License plate lights
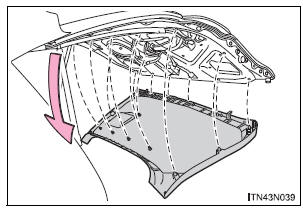
- Remove the back door trim board.
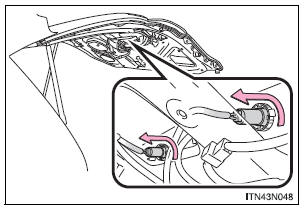
- Turn the bulb base counterclockwise.
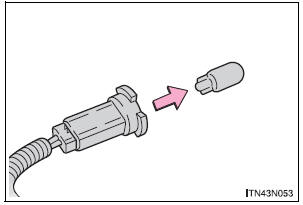
- Remove the light bulb.
Replacing the following bulbs
If any of the lights listed below has burnt out, have it replaced by your Toyota dealer.
- Headlight low beams (discharge bulbs)
- Parking lights (LED type)
- Daytime running lights (LED type)
- Side turn signal light (if equipped)
- Stop/tail lights (LED type) and rear side marker lights
- High mounted stoplight
- Outer foot lights (if equipped)
Discharge headlights (if equipped)
If voltage to the discharge bulbs is insufficient, the bulbs may not come on, or may go out temporarily. The discharge bulbs will come on when normal power is restored.
LED lights
The daytime running lights (LED type), parking lights (LED type), stop/tail (LED type), side turn signal light, rear side marker lights and high mounted stoplight consists of a number of LEDs. If any of the LEDs burn out, take your vehicle to your Toyota dealer to have the light replaced.
Condensation build-up on the inside of the lens
Temporary condensation build-up on the inside of the headlight lens does not indicate a malfunction. Contact your Toyota dealer for more information in the following situations:
- Large drops of water have built up on the inside of the lens.
- Water has built up inside the headlight.
When replacing light bulbs
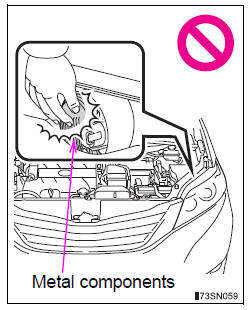
| WARNING Replacing light bulbs
Discharge headlights (if equipped)
When replacing the rear turn signal lights or stop/tail lights Inspect the gasket for any damage (rip, tear, hole, etc.). If there is any damage, please contact your Toyota dealer and have the gasket replaced. Improper installation of the gasket may result in water entering the rear light unit. To prevent damage or fire
|
| NOTICE When installing the back door trim To prevent damage, be careful not to pinch any of the wire harnesses or connectors with the back door trim. |
 Bulb locations
Front
Vehicles without daytime running lights or with bulb type daytime
running lights
Headlight high beam and daytime
running lights (if equipped)
Headlight low beam
(halogen bu ...

Other materials:
Detection range of the sensors
Approximately 2.0 ft. (60 cm)
Approximately 2.8 ft. (85 cm)
Approximately 5.9 ft. (180 cm)
The diagram shows the detection
range of the sensors. Note that the
sensors cannot detect obstacles
that are extremely close to the
vehicle.
The range of the sensors may
change depending ...
Parts location
HOW TO PROCEED WITH
TROUBLESHOOTING
1 VEHICLE BROUGHT TO WORKSHOP
2 CUSTOMER PROBLEM ANALYSIS
(a) Confirm problem symptoms.
3 CHECK AND CLEAR DTCS
4 PROBLEM SYMPTOM CONFIRMATION
5 SYMPTOM SIMULATION
6 DTC CHECK (OTHER THAN MULTIPLEX DTC)
7 DTC CHART
8 PROBLEM SYMP ...
System description
1. DESCRIPTION OF POWER REAR NO. 2 SEAT WITH
STOWING FUNCTION
A power rear no. 2 seat with stowing function has
been adopted for the third-row seats.
The power rear no. 2 seat with stowing function
electrically stows and returns the seat when the
power folding seat switch is ...
