Toyota Sienna Service Manual: Inspection
1. INSPECT BRAKE DISC INSIDE DIAMETER
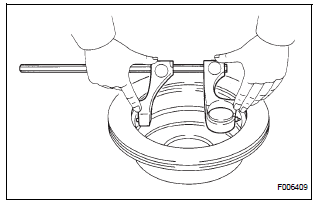
(a) Using a brake drum gauge or equivalent, measure the inside diameter of the disc.
Standard inside diameter: 190 mm (7.480 in.) Maximum inside diameter: 191 mm (7.520 in.)
2. INSPECT PARKING BRAKE SHOE LINING THICKNESS
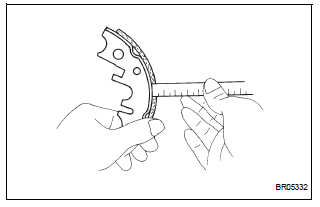
(a) Using a ruler, measure the thickness of the shoe lining.
Standard thickness: 2.5 mm (0.098 in.) Minimum thickness: 1.0 mm (0.039 in.)
3. INSPECT BRAKE DISC AND PARKING BRAKE SHOE LINING FOR PROPER CONTACT

(a) Apply chalk to the inside surface of the disc, then grind down the brake shoe lining to fit.
If the contact between the brake disc and the shoe lining is improper, repair it using a brake shoe grinder or replace the brake shoe assembly.
 Disassembly
HINT:
Overhaul the RH side by the same procedures as these of
the LH side.
1. REMOVE REAR WHEEL
2. SEPARATE REAR DISC BRAKE CALIPER
ASSEMBLY LH
HINT:
Do not disconnect the flexible hose from th ...
 Reassembly
1. APPLY HIGH TEMPERATURE GREASE
(a) Apply the high temperature grease to the surface on
which the shoe and backing plate attach.
2. INSTALL PARKING BRAKE SHOE LEVER LH
(a) Install the shoe lever ...
Other materials:
Internal Control Module Random Access Memory
(RAM) Error
DTC P0604 Internal Control Module Random Access Memory
(RAM) Error
DESCRIPTION
The ECM continuously monitors its own internal memory status, internal
circuits, and output signals
transmitted to the throttle actuator. This self-check ensures that the ECM is
functioning properly. If any
malfu ...
Problem symptoms table
ENTIRE SYSTEM
METER GAUGES
WARNING LIGHTS
INDICATOR LIGHTS
BUZZER
ACCESSORY METER ASSEMBLY
...
Installation
1. INSTALL PARKING BRAKE CONTROL PEDAL ASSEMBLY
(a) Install the parking brake control pedal assembly with
a bolt and the 2 nuts.
Torque: 39 N*m (398 kgf*cm, 29 ft.*lbf)
(b) Connect the parking brake switch connector.
(c) Connect the instrument panel junction block
assembly w/ wiring ha ...
