Toyota Sienna Service Manual: Inspection
1. INSPECT GARAGE DOOR OPENER
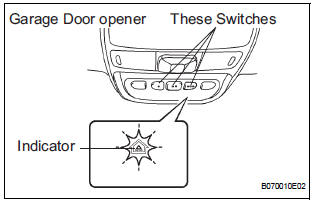
- Press the switch and check that each red LED turns on. If one or more of the switches does not turn on the LED, confirm normal operation of the fuse and wire harness, then replace the garage door opener.
2. INSPECT GARAGE DOOR OPENER REGISTRATION AND TRANSMITTING
HINT: Use the home link tester made by KENTMORE for this test. Because it is necessary to register the code of the hand-held transmitter, the customer's code should be erased. When the inspection is complete, register the customer's code again.
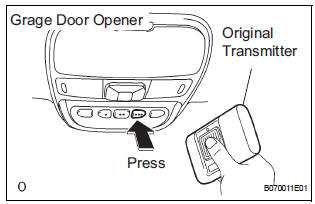
- Check that the code of hand-held transmitter for inspection can be registered.
HINT: If the code cannot be registered, replace the garage door opener.
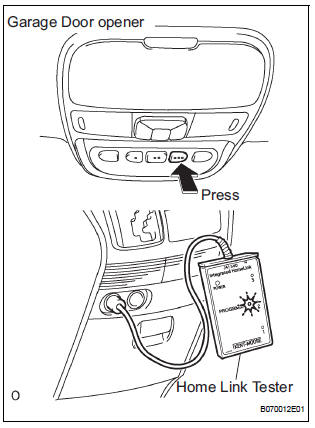
- Press the switch which inspection code has been
registered for and check that LED (green) of the
home link tester lights up.
HINT: If the LED (green) does not light up, replace the garage door opener.
- When the inspection is complete, reregister the customer's transmitter code(s) again.
 Registration
1. REGISTRATION TRANSMITTER CODE
HINT:
The garage door opener is built in the dome lamp
assembly No.1. When transmitter codes for garage door,
gate, entry gate, door lock, home lighting system or
...

Other materials:
Typical DOT and Tire Identification Number (TIN)
DOT symbol*
Tire Identification Number (TIN)
Tire manufacturer’s identification
mark
Tire size code
Manufacturer’s optional tire
type code (3 or 4 letters)
Manufacturing week
Manufacturing year
*: The DOT symbol certifies that the tire conforms to applicable Federal
Mo ...
ACIS Control Circuit
DESCRIPTION
This circuit opens and closes the Intake Air Control Valve (IACV) in response
to changes in the engine
load in order to increase the intake efficiency (ACIS: Acoustic Control
Induction System).
When the engine speed is between 0 and 4450 rpm and the throttle valve opening
angl ...
Setting the vehicle speed
Press the “ON-OFF” button to
activate the cruise control.
Cruise control indicator will come
on*1 or will be displayed on the
multi-information display*2.
Press the button again to deactivate
the cruise control.
Accelerate or decelerate the
vehicle to the desired s ...
