Toyota Sienna Service Manual: Installation
1. INSTALL FRONT PASSENGER AIRBAG ASSEMBLY
- Install the front passenger airbag assembly with the 2 screws.
2. INSTALL INSTRUMENT PANEL SUB-ASSEMBLY
3. CONNECT FRONT PASSENGER AIRBAG ASSEMBLY CONNECTOR
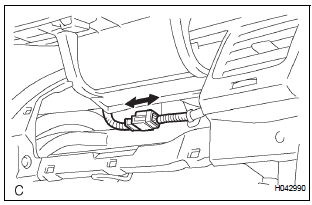
- Connect the connector to the front passenger airbag assembly.
NOTICE: When handling the airbag connector, take care not to damage the airbag wire harness.
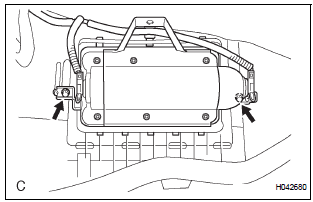
4. INSTALL INSTRUMENT PANEL BOX NO.2
5. INSTALL GLOVE COMPARTMENT DOOR ASSEMBLY
6. INSTALL STEERING COLUMN COVER
7. INSTALL STEERING WHEEL ASSEMBLY
8. INSPECT STEERING WHEEL CENTER POINT
9. INSTALL STEERING PAD
10. INSTALL STEERING WHEEL NO.2 COVER LOWER
11. INSTALL STEERING WHEEL NO.3 COVER LOWER
12. PLACE FRONT WHEELS FACING STRAIGHT AHEAD
13. CONNECT CABLE TO NEGATIVE BATTERY TERMINAL
14. PERFORM INITIALIZATION
- Perform initialization.
HINT: Some systems need initialization when disconnecting the cable from the negative battery terminal.
15. INSPECT SRS WARNING LIGHT
- Inspect the SRS warning light
 Removal
1. PRECAUTION
CAUTION:
Be sure to read "PRECAUTION" thoroughly before
servicing.
2. DISCONNECT CABLE FROM NEGATIVE BATTERY
TERMINAL
CAUTION:
Wait for 90 seconds after disconnecting th ...
 Disposal
HINT:
When scrapping a vehicle equipped with the SRS or
disposing of the front passenger airbag assembly, be sure to
deploy the airbag first in accordance with the procedure
described below. If an ...
Other materials:
Oxygen (A/F) Sensor Heater Control Circuit
HINT
Although the DTC titles say the oxygen sensor, these DTCs relate to the
Air-Fuel Ratio (A/F) sensor.
Sensor 1 refers to the sensor mounted in front of the Three-Way
Catalytic Converter (TWC) and
located near the engine assembly.
DESCRIPTION
Refer to DTC P2195 (See page ES- ...
Changing the engine switch positions
“LOCK”
The steering wheel is locked and
the key can be removed. (The key
can be removed only when the
shift lever is in “P”.)
“ACC”
Some electrical components such
as the audio system can be used.
“ON”
All electrical components can be
used.
“START”
...
Knock Sensor 1 Circuit Low Input
DESCRIPTION
A flat type knock sensor (non-resonant type) has a structure that can detect
vibrations over a wide band of
frequencies: between approximately 6 kHz and 15 kHz.
Knock sensors are fitted onto the engine block to detect engine knocking.
The knock sensor contains a piezoelectr ...
