Toyota Sienna 2010-2026 Owners Manual: Installing child restraints using a seat belt (child restraint lock function belt)
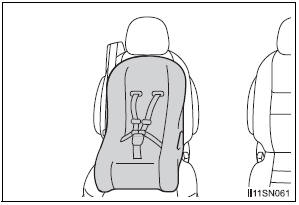
Rear facing - Infant seat/convertible seat
- Place the child restraint system on the rear seat facing the rear of the vehicle.
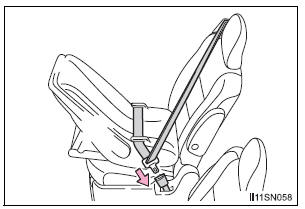
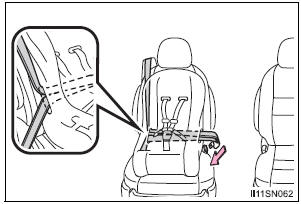
- Run the seat belt through the child restraint system and insert the plate into the buckle. Make sure that the belt is not twisted.
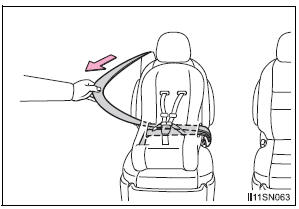
- Fully extend the shoulder belt and allow it to retract to put it in lock mode. In lock mode, the belt cannot be extended.
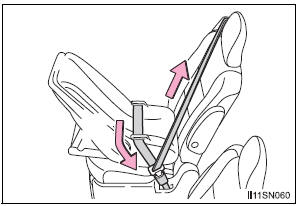
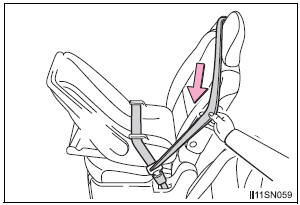
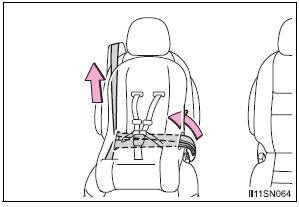
- While pushing the child
restraint system down into
the rear seat, allow the
shoulder belt to retract until
the child restraint system is
securely in place.
After the shoulder belt has retracted to a point where there is no slack in the belt, pull the belt to check that it cannot be extended.
Forward facing - Convertible seat
- Place the child restraint system on the seat facing the front of the vehicle.
- Run the seat belt through the child restraint system and insert the plate into the buckle. Make sure that the belt is not twisted.
- Fully extend the shoulder belt and allow it to retract to put it in lock mode. In lock mode, the belt cannot be extended.
- While pushing the child
restraint system into the rear
seat, allow the shoulder belt
to retract until the child
restraint system is securely
in place.
After the shoulder belt has retracted to a point where there is no slack in the belt, pull the belt to check that it cannot be extended.
- If the child restraint has a top tether strap, the top tether strap should be latched onto the top tether strap anchor.
Booster seat

- Place the child restraint system on the seat facing the front of the vehicle.
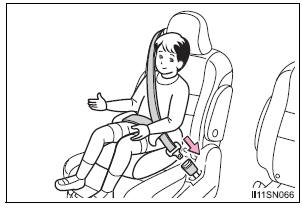
- Sit the child in the child
restraint system. Fit the seat
belt to the child restraint system
according to the manufacturer’s
instructions and
insert the plate into the
buckle. Make sure that the
belt is not twisted.
Check that the shoulder belt is correctly positioned over the child’s shoulder and that the lap belt is as low as possible.
 Installation with LATCH system (third seat)
Manual seat
Fold the seatback while pulling
the strap. Return the seatback
and secure it at the 1st lock
position (most upright position).
Adjust the seatback to the
11th lock p ...
 Removing a child restraint installed with a seat belt
Push the buckle release button
and fully retract the seat belt.
...
Other materials:
Outer mirror switch
Inspection
1. INSPECT OUTER MIRROR SWITCH ASSEMBLY (w/o
Memory)
The L side of the left / right adjustment switch:
Inspect the mirror switch resistance.
Standard resistance (Left side)
If the result is not as specified, replace the switch
assembly.
The R side of t ...
Installation
1. INSTALL REAR SEAT 3 POINT TYPE BELT
ASSEMBLY (for 8-Passenger)
HINT: Refer to the instructions for reassembly of the rear
No. 1 seat assembly (for center seat).
Install the rear seat 3 point type belt assembly with
the bolt.
Torque: 42 N*m (430 kgf*cm, 31 ft.*lbf)
2. INSTALL ...
Air outlet control servo motor (for rear air conditioning system)
ON-VEHICLE INSPECTION
1. INSPECT REAR AIR OUTLET CONTROL SERVO
MOTOR
(a) Inspect servo motor operation.
(1) Connect the positive (+) lead from the battery
to terminal 4 and negative (-) lead to terminal 5,
then check that the arm turns to "FOOT" side
smoothly.
(2) Connect t ...
