Toyota Sienna Service Manual: Removal
1. Remove rear wheel
2. Remove exhaust pipe assembly
Hint: (see page ex-8)
3. Remove propeller with center bearing shaft assembly
Hint: (see page pr-3)
4. REMOVE REAR DIFFERENTIAL FILLER PLUG
(A) using a hexagon wrench (10 mm), remove the filler plug and gasket.
5. Remove rear differential drain plug
(A) using a hexagon wrench (10 mm), remove the drain plug and gasket, and drain the oil.
6. Remove rear speed sensor lh
Hint: removal procedure or rh side is the same as that or lh side. (See page ds-21)
7. Remove rear axle shaft nut lh
Hint: removal procedure or rh side is the same as that or lh side. (See page ds-21)
8. REMOVE REAR DRIVE SHAFT ASSEMBLY LH
Hint: removal procedure or rh side is the same as that or lh side. (See page ds-21)
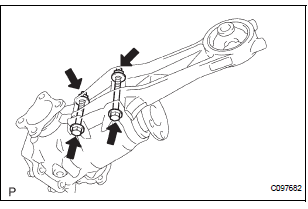
9. REMOVE REAR DIFFERENTIAL CARRIER ASSEMBLY
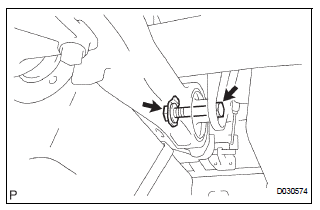
(A) support the rear differential carrier assembly with a jack.
(b) Remove the bolt and nut, separate the No. 1 rear differential support.
(c) Remove the 2 bolts, separate the rear differential support assembly.
NOTICE: Be careful not to drop the rear differential carrier assembly.
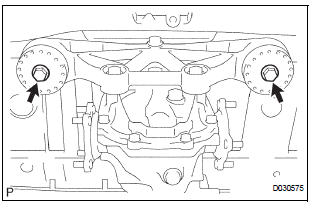
10. REMOVE REAR DIFFERENTIAL SUPPORT ASSEMBLY
(a) Remove the 3 bolts and rear differential support assembly.
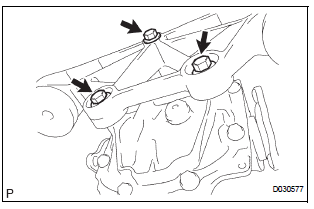
11. REMOVE REAR DIFFERENTIAL DYNAMIC DAMPER
(a) Remove the 2 bolts and rear differential dynamic damper from the No. 1 rear differential support.
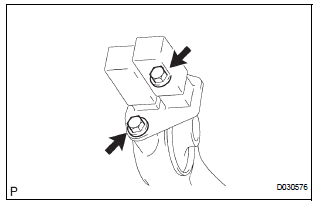
12. REMOVE NO. 1 REAR DIFFERENTIAL SUPPORT
(a) Remove the 2 bolts, 2 nuts and No. 1 rear differential support.
 Rear differential carrier assembly
Components
...
 Installation
1. INSTALL NO. 1 REAR DIFFERENTIAL SUPPORT
(a) Install the No. 1 rear differential support to the rear
differential carrier assembly with the 2 bolts and 2
nuts.
Torque: 85 N*m (867 kgf*cm, 63 ...
Other materials:
On-vehicle inspection
1. CHECK POWER REAR NO. 2 SEAT with STOWING FUNCTION
Check the basic functions.
Operate the fold seat switch and power rear
No.2 seat switch and check to make sure each
seat function works:
Folding-down operation
Stowing operation
Return operation
...
Installation
1. INSTALL THROTTLE BODY
Install a new throttle body gasket to the intake air
surge tank.
Install the throttle body with the 4 bolts.
Torque: 10 N*m (102 kgf*cm, 7 ft.*lbf)
Connect the 2 water by-pass hoses.
Connect the throttle body connector and clamp.
2. ...
Stereo Component Amplifier Power Source Circuit
DESCRIPTION
This circuit provides power to the stereo component amplifier.
WIRING DIAGRAM
INSPECTION PROCEDURE
1 INSPECT STEREO COMPONENT AMPLIFIER
Disconnect the stereo component amplifier connector.
Measure the resistance according to the value(s) in the
table below.
S ...
