Toyota Sienna Service Manual: Removal
1. REMOVE FRONT WHEELS
2. REMOVE FRONT STABILIZER LINK ASSEMBLY LH
HINT: (See page SP-26)
3. REMOVE FRONT STABILIZER LINK ASSEMBLY RH
HINT: Remove the RH side by the same procedures as the LH side.
4. REMOVE CENTER EXHAUST PIPE ASSEMBLY
HINT: (See page EX-8)
5. REMOVE NO. 1 FRONT STABILIZER BRACKET LH
(a) Remove the 2 bolts, the front stabilizer bracket No.1 LH and the front stabilizer bracket No.2 LH.
6. REMOVE NO. 1 FRONT STABILIZER BRACKET RH
HINT: Remove the RH side by the same procedures as the LH side.
7. SEPARATE TIE ROD ASSEMBLY LH
HINT: (See page AH-4) SST 09628-62011
8. SEPARATE TIE ROD ASSEMBLY RH
SST 09628-62011
HINT: Remove the RH side by the same procedures as the LH side.
9. SEPARATE PRESSURE FEED TUBE ASSEMBLY
HINT: (See page PS-21) SST 09023-12701
10. SEPARATE STEERING INTERMEDIATE SHAFT ASSEMBLY
HINT: (See page PS-21)
11. REMOVE RACK & PINION POWER STEERING GEAR ASSEMBLY
HINT: (See page PS-21)
12. REMOVE MANIFOLD STAY
HINT: (See page EM-39)
13. REMOVE EXHAUST MANIFOLD SUB-ASSEMBLY RH
HINT: (See page EM-37)
14. REMOVE NO. 1 FRONT STABILIZER BAR BUSHING
15. REMOVE FRONT STABILIZER BAR
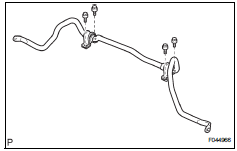
 Front stabilizer bar (for 4wd)
COMPONENTS
...
 Inspection
1. INSPECT FRONT STABILIZER LINK ASSEMBLY LH
(a) As shown in the illustration, flip the ball joint stud
back and forth 5 times, before installing the nut.
(b) Using a torque wrench, turn the nut ...
Other materials:
Removal
1. REMOVE INSTRUMENT CLUSTER CENTER NO. 1 FINISH PANEL
2. REMOVE INSTRUMENT CLUSTER CENTER NO. 2 FINISH PANEL
3. REMOVE INSTRUMENT CLUSTER FINISH PANEL GARNISH
4. REMOVE RADIO RECEIVER
Remove the 4 screws.
Disconnect the connectors and remove the radio
receiver with bracke ...
Engine
ON-VEHICLE INSPECTION
1. INSPECT ENGINE COOLANT
(a) Inspect the engine coolant (See page CO-1).
2. INSPECT ENGINE OIL
(a) Inspect the engine oil (See page LU-1).
3. INSPECT BATTERY
(a) Inspect the battery (See page CH-5).
4. INSPECT AIR CLEANER FILTER ELEMENT SUBASSEMBLY
(a) Remove the air c ...
Vehicle Speed Signal Error (Test Mode DTC)
DTC C2191/91 Vehicle Speed Signal Error (Test Mode DTC)
DESCRIPTION
The tire pressure warning ECU receives a speed signal from the combination
meter. This DTC is stored
upon entering test mode, and cleared when a vehicle speed signal of 12 mph (20
km/h) is detected for 3
seconds or more. Thi ...
