Toyota Sienna Service Manual: Removal
1. REMOVE BATTERY
2. REMOVE AIR CLEANER ASSEMBLY
HINT: (See page EM-26)
3. SEPARATE TRANSMISSION CONTROL CABLE ASSEMBLY
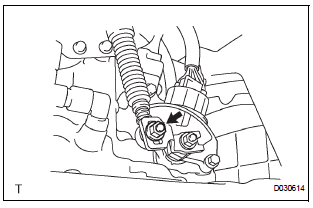
(a) Remove the nut from the control shaft lever.
(b) Disconnect the control cable from the control shaft lever.
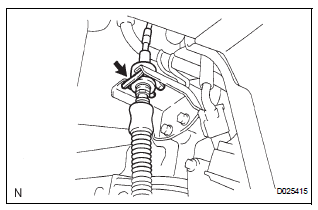
(c) Remove the clip and disconnect the control cable from the control cable bracket.
NOTICE: Do not hold the resin guide pipe.
4. REMOVE PARK/NEUTRAL POSITION SWITCH ASSEMBLY

(a) Disconnect the park/neutral position switch connector.
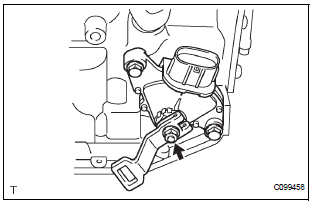
(b) Remove the nut, washer and control shaft lever
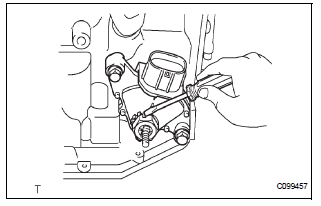
(c) Using a screwdriver, pry up the lock plate.
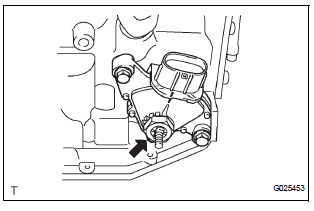
(d) Remove the lock nut and the lock plate.
(e) Remove the 2 bolts and pull out the park/neutral position switch.
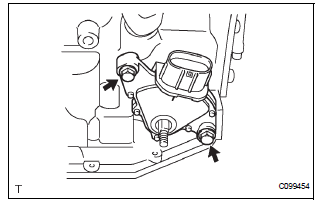
 Park / neutral position switch
Components
...
 Inspection
1. INSPECT PARK/NEUTRAL POSITION SWITCH ASSEMBLY OPERATION
(a) Apply the parking brake and turn the ignition switch
to the ON position.
(b) Depress the brake pedal and check that the engine
star ...
Other materials:
Installation
1. Connect inlet sub-assembly
(a) Connect the inlet hose to the radiator.
(b) Install the inlet sub-assembly to the radiator with the
bolt.
Torque: 7.1 N*m (72 kgf*cm, 63 in.*lbf)V
2. Install no. 2 Radiator support
(A) install the no. 2 Radiator support to the radiator with
the 2 ...
Summary of functions
Dynamic radar cruise control supplements conventional cruise control
with a vehicle-to-vehicle distance control. In vehicle-to-vehicle distance
control mode, the vehicle automatically accelerates or decelerates
in order to maintain a set following distance from vehicles ahead.
Multi-infor ...
Sound Signal Circuit between Video Terminal and Television Display
DESCRIPTION
This is the sound signal circuit from the video (video adapter) terminal to
the television display assembly.
WIRING DIAGRAM
INSPECTION PROCEDURE
1 CHECK HARNESS AND CONNECTOR (TELEVISION DISPLAY ASSEMBLY - VIDEO
TERMINAL)
Disconnect the connectors from the video (vide ...
