Toyota Sienna Service Manual: Window glass antenna wire
INSPECTION
1. INSPECT WINDOW GLASS ANTENNA WIRE
- Inspect the wind glass antenna wire.
NOTICE: When cleaning the glass, use a soft, dry cloth, and wipe the glass in the direction of the wire.
Take care not to damage the wires. Do not use detergents or glass cleaners with abrasive.
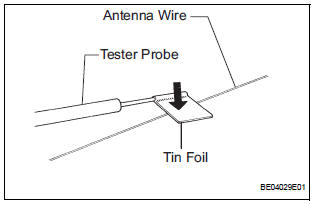
When measuring voltage, wind a piece of tin foil around the top of the negative probe and press the foil against the wire with your finger, as shown in the illustration.
- Check the continuity, at the center of each antenna wire, as shown in the illustration
REPAIR
1. REPAIR WINDOW GLASS ANTENNA WIRE
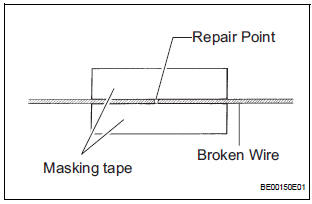
- Clean the broken wire tips with a grease, wax and silicone remover.
- Place the masking tape along both sides of the wire to be repaired.
- Thoroughly mix the repair agent (Dupont paste No.
4817).
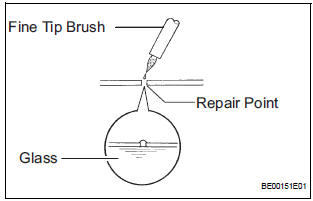
- Using a fine tip brush, apply a small amount of the mixture to the wire.
- After a few minutes, remove the masking tape.
- Do not repair the defogger wire for at least 24 hours.
 Installation
1. INSTALL STEERING PAD SWITCH LH
2. INSTALL HONE BUTTON ASSEMBLY
3. INSTALL STEERING WHEEL NO. 3 LOWER COVER
4. INSTALL STEERING WHEEL NO. 2 LOWER COVER
5. CONNECT CABLE TO NEGATIVE BATTERY
TERM ...
 Front No. 1 speaker
COMPONENTS
ON-VEHICLE INSPECTION
1. INSPECT FRONT NO.1 SPEAKER
HINT:
Remove interior parts so that the front No.1 speaker can
be seen.
Check the speaker installation.
OK:
The ...
Other materials:
Window defogger switch
INSPECTION
1. INSPECT WINDOW DEFOGGER SWITCH
Check the defogger switch illuminates.
Standard
If the result is not as specified, replace the switch
assembly or bulb.
Check the defogger timer.
Connect the positive (+) lead from the battery
to terminal 2 and ...
Disassembly
1. INSPECT PACK CLEARANCE OF REVERSE CLUTCH
HINT:
(See page AX-249)
2. INSPECT PACK CLEARANCE OF DIRECT CLUTCH
AND OVERDRIVE CLUTCH
HINT:
(See page AX-249)
3. REMOVE DIRECT MULTIPLE DISC CLUTCH DISC
(a) Using a screwdriver, remove the snap ring from the
intermediate shaft.
(b) Remo ...
Half Connection in Center Airbag Sensor
Assembly Connectors
DTC B1135/24 Half Connection in Center Airbag Sensor
Assembly Connectors
DESCRIPTION
The center airbag sensor assembly connector has a mechanism that electrically
detects half connection.
The center airbag sensor assembly monitors the voltage applied to the
disconnection detection pins and ...
