Toyota Sienna Service Manual: Adjustment
1. INSPECT SHIFT LEVER POSITION
(a) When shifting from P to R position only with ignition switch ON and brake pedal, make sure that the shifting lever moves smoothly and can be moderately operated.
(b) When starting engine, make sure that the vehicle moves forward when shifting from N to D position and moves rearward when shifting to R position.
2. ADJUST SHIFT LEVER POSITION
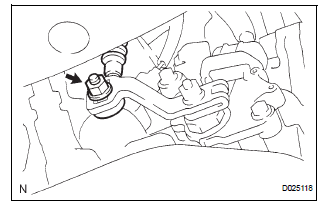
(a) Loosen the nut on the control shaft lever.
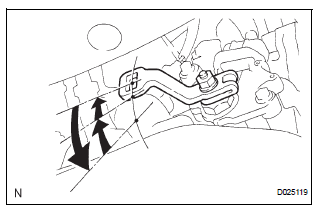
(b) Push the control shaft fully downward.
(c) Return the control shaft lever 2 notches to the N position.
(d) While pushing the control cable end up with the shift lever in the N position, install it to the control shaft lever with the nut.
Torque: 13 N*m (132.6 kgf*cm, 9.5 ft.*lbf)
NOTICE:
|
(e) Start the engine and make sure that the vehicle moves forward when shifting the lever from the N to D position and moves rearward when shifting it to the R position.
 Disassembly
1. REMOVE INDICATOR LIGHT WIRE SUB-ASSEMBLY
(a) Remove the indicator light wire sub assembly from
the position indicator light guide.
2. REMOVE POSITION INDICATOR LIGHT BULB
(a) Remove the shi ...
 Reassembly
1. Install position indicator slide cover
(a) Install the position indicator slide cover No.2 to the
position indicator slide cover.
2. INSTALL POSITION INDICATOR SLIDE COVER
(a) Install the p ...
Other materials:
Stuck in Deceleration Sensor
DESCRIPTION
The yaw rate sensor and deceleration sensor signal is sent to the skid
control ECU through the CAN
communication system. When there is a malfunction in the communication, it will
be detected by the
diagnosis function.
WIRING DIAGRAM
INSPECTION PROCEDURE
HINT:
When ...
Perform signal check
HINT:
When entering signal check mode, the tire pressure
warning ECU sets all the signal check DTCs first.
After completing signal check for each inspection
item, the DTCs for systems that are determined to be
normal by the tire pressure warning ECU will be
erased.
The DTCs f ...
Taillight Relay Circuit
DESCRIPTION
The Multiplex network body ECU controls TAIL relay when signal is received
from headlight dimmer
switch assembly.
WIRING DIAGRAM
INSPECTION PROCEDURE
1 PERFORM ACTIVE TEST BY INTELLIGENT TESTER
Connect the intelligent tester to DLC3.
Turn the ignition switch ON and ...
