Toyota Sienna Service Manual: No. 2 Speaker with box
COMPONENTS

ON-VEHICLE INSPECTION
1. INSPECT NO.2 SPEAKER WITH BOX
HINT: Remove interior parts so that the No.2 speaker with box can be seen.
- Check the speaker installation.
OK: The speaker is securely installed.
If the result is not as specified, reinstall the No.2 speaker with box.
- Visually check the speaker.
OK: The cone paper of the speaker is not torn.
If the result is not as specified, replace the No.2 speaker with box.
- Speaker resistance check
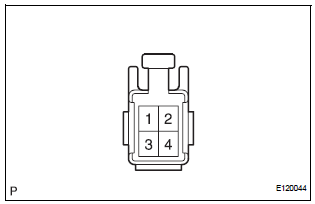
- Disconnect the front No.2 speaker with box connector.
- Measure the resistance between the terminals of the speaker.
NOTICE: The speaker should not be removed for checking.
Standard resistance

If the result is not as specified, replace the No.2 speaker with box.
REMOVAL
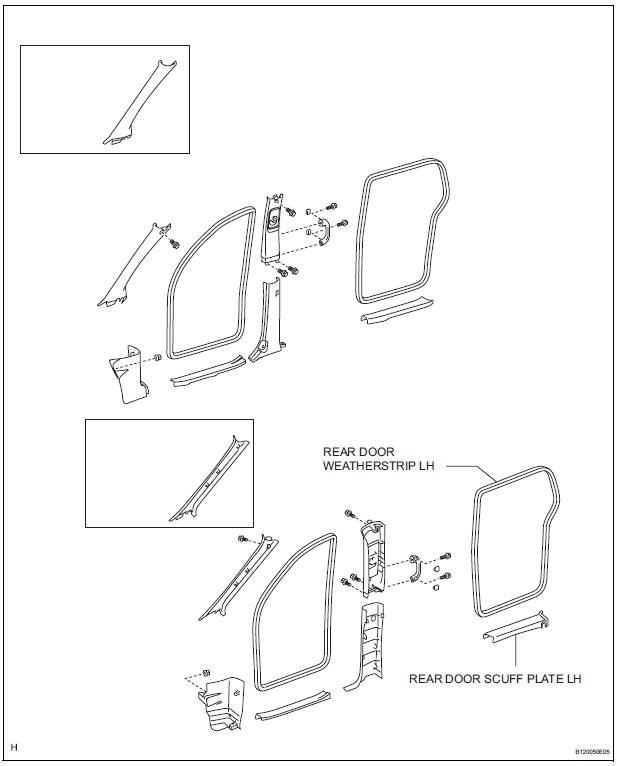
1. REMOVE REAR DOOR SCUFF PLATE LH
2. REMOVE REAR DOOR WEATHERSTRIP LH
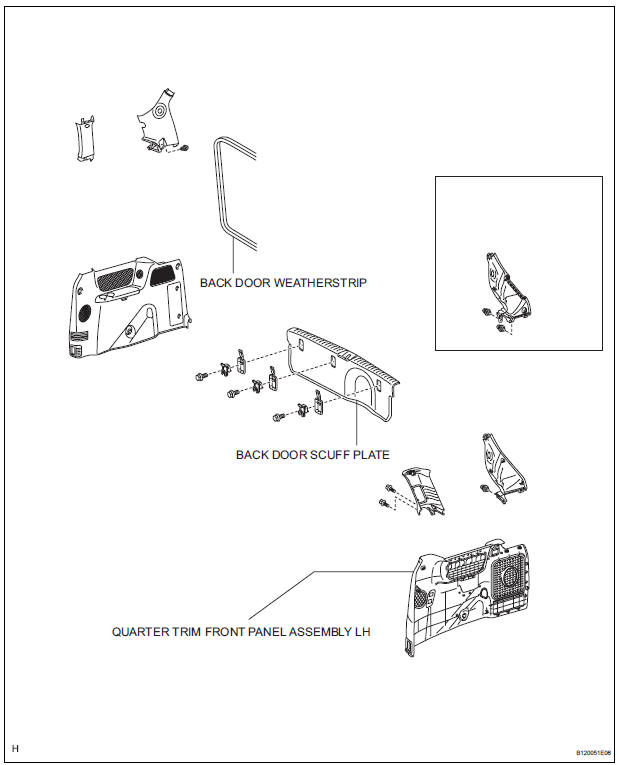
3. REMOVE BACK DOOR WEATHERSTRIP
4. REMOVE BACK DOOR SCUFF PLATE
5. REMOVE QUARTER TRIM FRONT PANEL ASSEMBLY LH
6. REMOVE NO. 2 SPEAKER ASSEMBLY WITH BOX
- Disconnect the connector.
- Remove the 5 bolts and No. 2 speaker assembly with box.
INSTALLATION
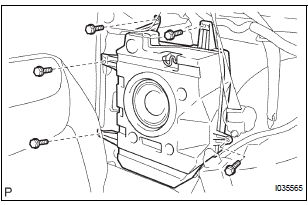
1. INSTALL NO. 2 SPEAKER ASSEMBLY WITH BOX
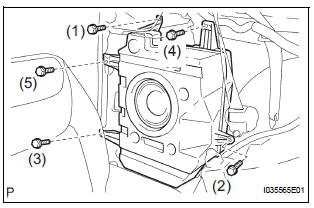
- Install the No. 2 speaker assembly with box with the
5 bolts.
NOTICE: Tighten the bolts in order shown in the illustration to install the No. 2 speaker assembly with box.
- Connect the connector.
2. INSTALL QUARTER TRIM FRONT PANEL ASSEMBLY LH
3. INSTALL BACK DOOR SCUFF PLATE
4. INSTALL BACK DOOR WEATHERSTRIP
5. INSTALL REAR DOOR WEATHERSTRIP LH
6. INSTALL REAR DOOR SCUFF PLATE LH
 No. 1 Speaker with box
COMPONENTS
ON-VEHICLE INSPECTION
1. INSPECT NO.1 SPEAKER WITH BOX
HINT:
Remove interior parts so that the No.1 speaker with box
can be seen.
Check the speaker installation.
OK ...
 Navigation
...
Other materials:
Shift position purpose
*1: Shifting to the D position allows the system to select a gear suitable
for
the driving conditions. Setting the shift lever to the D position is recommended
for normal driving.
*2: Selecting shift ranges using S mode restricts the upper limit of the
possible
gear ranges, controls en ...
Display contents
The multi-information display presents
the driver with a variety of
vehicle data.
Menu icons
Displays the following information when an icon is selected.
Some of the information may be displayed automatically depending
on the situation.
Drive information
Select to display various ...
Short to GND in Side Squib LH Circuit
DTC B0117/45 Short to GND in Side Squib LH Circuit
DESCRIPTION
The side squib LH circuit consists of the center airbag sensor assembly and
the front seat side airbag
assembly LH.
This circuit instructs the SRS to deploy when deployment conditions are met.
DTC B0117/45 is recorded when a s ...
