Toyota Sienna Service Manual: On-vehicle inspection
1. INSPECT FRONT PASSENGER AIRBAG ASSEMBLY (VEHICLE NOT INVOLVED IN COLLISION)
- Perform a diagnostic system check.
- With the front passenger airbag assembly installed on the vehicle, perform a visual check. If there are any defects as mentioned below, replace the instrument panel with a new one: Cuts, minute cracks or marked discoloration on the instrument panel around the front passenger airbag assembly.
2. INSPECT FRONT PASSENGER AIRBAG ASSEMBLY (VEHICLE INVOLVED IN COLLISION AND AIRBAG HAS NOT DEPLOYED)
- Perform a diagnostic system check.
- With the front passenger airbag assembly removed from the vehicle, perform a visual check. If there are any defects as mentioned below, replace the front passenger airbag assembly, instrument panel or instrument panel reinforcement with a new one:
- Cuts, minute cracks or marked discoloration on the front passenger airbag assembly.
- Cracks or other damage to the connectors.
- Deformation or cracks on the instrument panel or instrument panel reinforcement.
HINT: There should be no interference between the instrument panel and the front passenger airbag assembly.
CAUTION: Be sure to follow the correct removal and installation procedures.
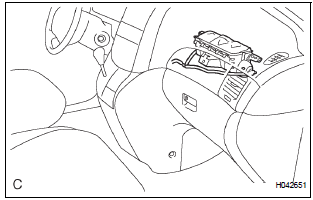
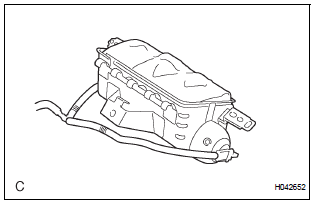
 Front passenger airbag assembly
COMPONENTS
...
 Removal
1. PRECAUTION
CAUTION:
Be sure to read "PRECAUTION" thoroughly before
servicing.
2. DISCONNECT CABLE FROM NEGATIVE BATTERY
TERMINAL
CAUTION:
Wait for 90 seconds after disconnecting th ...
Other materials:
Control Module Performance
DESCRIPTION
The ECM continuously monitors its main and sub CPUs. This self-check ensures
that the ECM is
functioning properly. If outputs from the CPUs are different and deviate from
the standards, the ECM will
illuminate the MIL and set a DTC immediately.
The ECM also monitors the cru ...
Air outlets
Location of air outlets
The air outlets and air volume
changes according to the
selected air flow mode.
Adjusting the position of the air outlets
Direct air flow to the front or
rear, up or down.
Temperature display
The temperature display on the multi-information display can be chan ...
Transmission Fluid Temperature Sensor "A"
Performance
DESCRIPTION
The ATF (Automatic Transmission Fluid) temperature sensor converts the fluid
temperature into a
resistance value which is input into the ECM.
MONITOR DESCRIPTION
The ATF temperature sensor converts the ATF temperature to an electrical
resistance value. Based on
the resis ...
