Toyota Sienna Service Manual: Removal
1. DISCONNECT CABLE FROM NEGATIVE BATTERY TERMINAL
2. REMOVE ENGINE UNDER COVER NO.1
3. DRAIN AUTOMATIC TRANSAXLE FLUID
(a) Remove the drain plug and gasket, and drain the ATF.
(b) Install a new gasket and the drain plug.
Torque: 49 N*m (500 kgf*cm, 36 ft.*lbf)
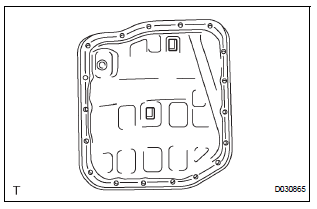
4. REMOVE AUTOMATIC TRANSAXLE OIL PAN SUBASSEMBLY
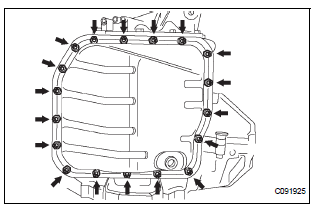
(a) Remove the 18 bolts, oil pan and gasket.
| NOTICE: Some fluid will remain in the oil pan. Carefully remove the oil pan so that fluid remaining in the pan does not spill out. |
(b) Remove the 2 magnets from the oil pan.
(c) Examine particles in the pan.
(1) Collect any steel chips using the removed magnets. Look carefully at the chips and particles in the pan and on the magnets to see the type of wear which might be found in the transaxle.
Result: Steel (magnetic): Wear of the bearing, gear or plate Brass (non-magnetic): Wear of the bearing
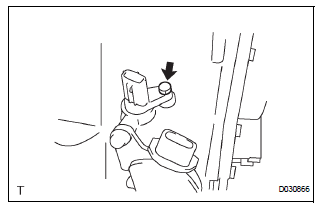
5. DISCONNECT TRANSMISSION WIRE
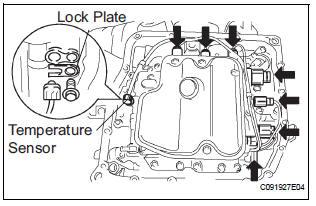
(a) Disconnect the 7 shift solenoid valve connectors.
(b) Remove the bolt and lock plate, and disconnect the ATF temperature sensor.
6. REMOVE TRANSMISSION WIRE
(a) Disconnect the transmission wire connector.
(b) Remove the bolt and transmission wire.
(c) Remove the O-ring from the transmission wire.
 Transmission Wire
COMPONENTS
...
 Installation
1. INSTALL TRANSMISSION WIRE
(a) Coat the O-ring of the transmission wire connector
with ATF and install it.
(b) Install the transmission wire with the bolt.
Torque: 5.4 N*m (55 kgf*cm, 48 ...
Other materials:
Seat belt warning system
PARTS LOCATION
Problem symptoms table
SEAT BELT WARNING SYSTEM
Symptom
Suspected Area
Driver side seat belt waning light does not operate
Fuse
Combination meter
Center airbag sensor assembly
Front seat inner belt assembly
Wire harness
...
When towing full-time 4wd vehicles
Use one of the methods shown below to tow the
vehicle.
If the vehicle has trouble with the chassis or drive
train, use method 1 (flat bed truck).
WHEN TOWING FULL-TIME 4WD VEHICLES
NOTICE: Do not use any towing method other than those shown above.
The towing methods shown b ...
DTC check / clear
1. CHECK DTC (USING INTELLIGENT TESTER)
Checking DTCs.
Connect the intelligent tester to the DLC3.
Turn the ignition switch ON.
Read DTCs by following the prompts on the
tester screen.
HINT:
Refer to the intelligent tester operator's manual
for further details.
2. CLEAR DTC ...
