Toyota Sienna Service Manual: Terminals of ECU
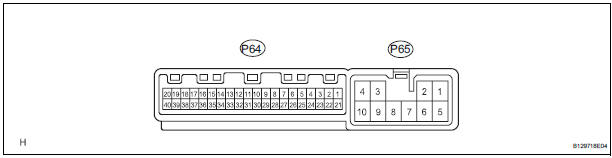
1. FOLD SEAT CONTROL ECU LH
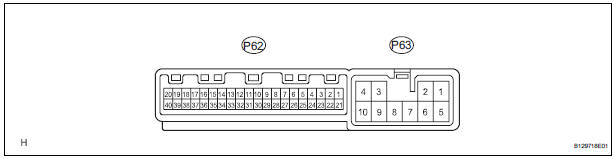
- Disconnect the fold seat control ECU connectors.
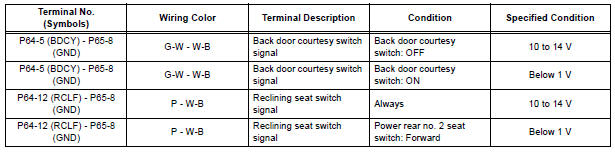
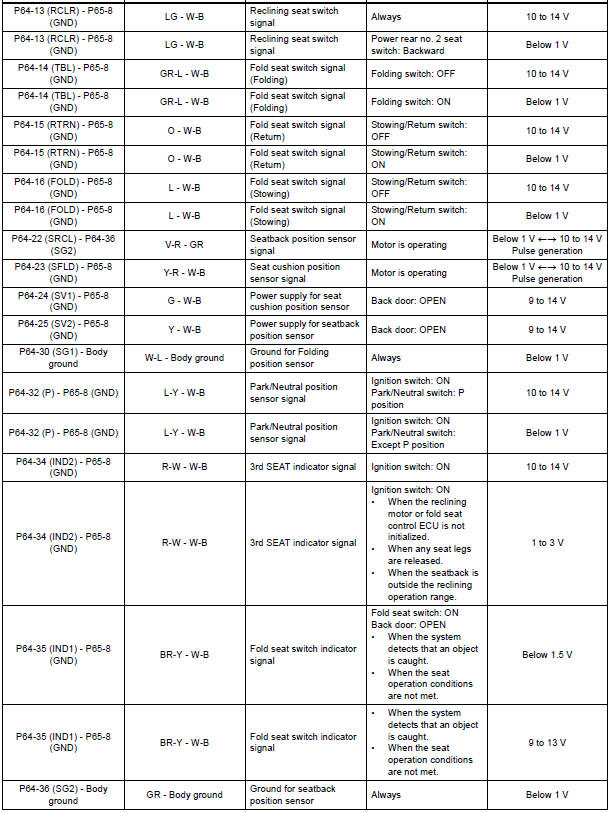
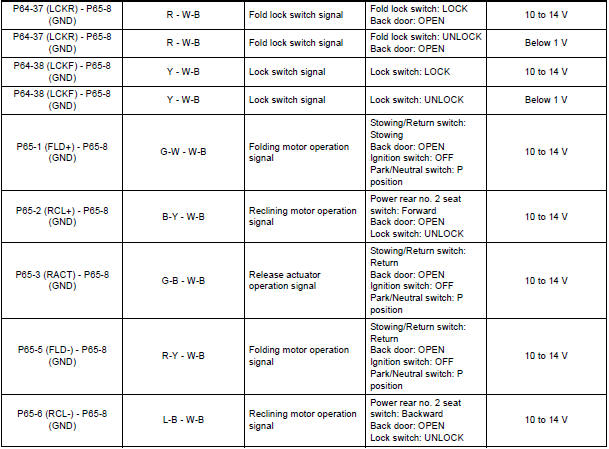
- Measure the voltage and resistance of the wire harness side connectors.

If the result is not as specified, there may be a malfunction on the wire harness side.
- Reconnect the fold seat control ECU connectors.
- Measure the voltage of the connectors.
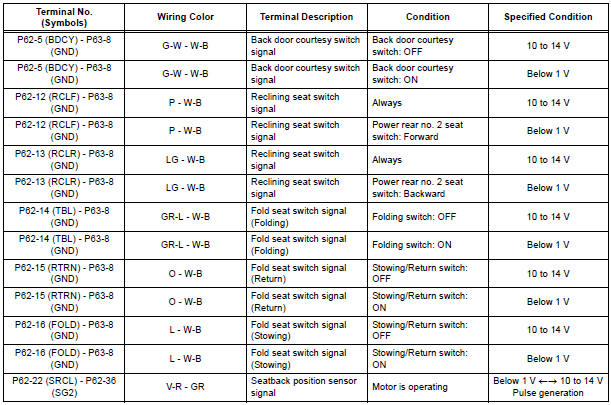
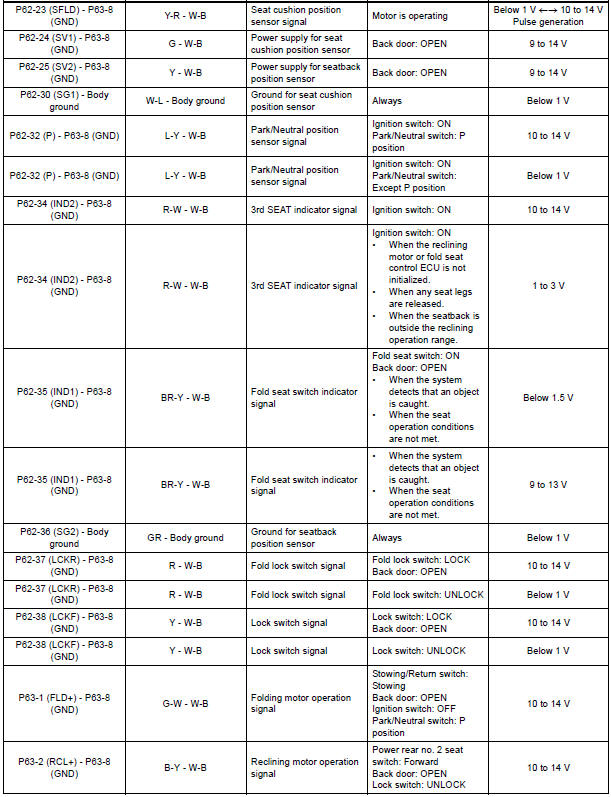
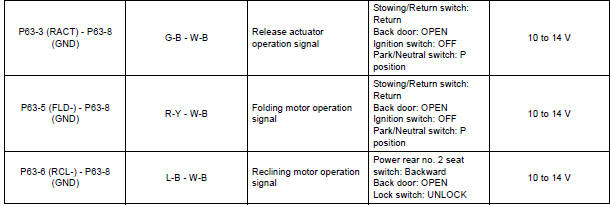
If the result is not as specified, the fold seat control ECU may have a malfunction.
2. FOLD SEAT CONTROL ECU RH
- Disconnect the fold seat control ECU connectors.
- Measure the voltage and resistance of the wire harness side connectors.

If the result is not as specified, there may be a malfunction on the wire harness side.
- Reconnect the fold seat control ECU connectors.
- Measure the voltage of the connectors.
If the result is not as specified, the fold seat control ECU may have a malfunction.
 Problem symptoms table
HINT:
Use the table below to help determine the cause of the
problem symptom. The potential causes of the symptoms
are listed in order of probability in the "Suspect Area"
co ...
 Diagnosis system
1. CHECK DLC3
The vehicle uses ISO 15765-4 communication
protocol.
The terminal arrangement of the DLC3 complies
with SAE 1962 and matched the ISO 15765-4
format.
If the resul ...
Other materials:
Refrigerant
On-vehicle inspection
1. INSPECT REFRIGERANT PRESSURE WITH MANIFOLD GAUGE SET
(a) This method uses a manifold gauge set to locate
problem areas. Read the manifold gauge pressure
when these conditions are established.
Test conditions:
Temperature at the air inlet is 30 to 35°C (86 to
95 ...
Catalyst System Efficiency Below Threshold
MONITOR DESCRIPTION
The ECM uses the sensors mounted in front of and behind the three-way
catalyst (TWC) to monitor its
efficiency. The first sensor, an Air Fuel ratio (A/F) sensor, sends pre-catalyst
A/F ratio information to the
ECM. The second sensor, a heated oxygen sensor (O2S), sends ...
Installation
1. INSTALL FRONT SUSPENSION ARM SUBASSEMBLY LOWER NO.1 LH
(a) Install the front lower arm bush stopper to the front
suspension arm sub-assembly lower No.1 LH.
(b) Install the bolt and nut to the rear side of the front
suspension arm sub-assembly lower No.1 LH.
Torque: 206 N*m (2,100 kgf ...
