Toyota Sienna Service Manual: Installation
1. INSTALL NO.1 NAVIGATION BRACKET
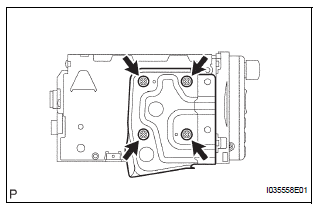
- Install the No.1 navigation bracket with the 4 screws.
2. INSTALL NO.2 NAVIGATION BRACKET
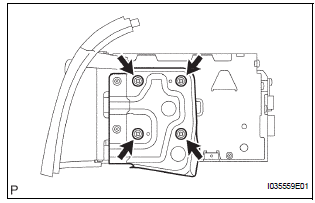
- Install the No.2 navigation bracket with the 4 screws.
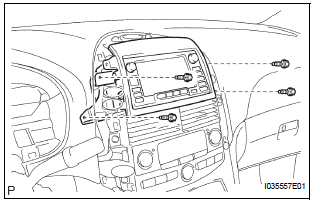
3. INSTALL INSTRUMENT CLUSTER FINISH PANEL UPPER
- Install the instrument cluster finish panel upper with the 4 screws.
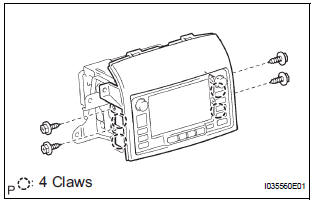
4. INSTALL NAVIGATION RECEIVER ASSEMBLY WITH BRACKET
- Connect the connector.
- Install the navigation receiver assembly with bracket with the 4 screws.
 Removal
1. REMOVE INSTRUMENT CLUSTER NO.1 FINISH PANEL CENTER
2. REMOVE INSTRUMENT CLUSTER NO.2 FINISH
PANEL CENTER
3. REMOVE INSTRUMENT CLUSTER FINISH PANEL GARNISH
4. REMOVE NAVIGATION RECEIVER ASSEMBLY ...
 Navigation antenna
COMPONENTS
...
Other materials:
Disposal
HINT:
When scrapping a vehicle equipped with the SRS or
disposing of the front passenger airbag assembly, be sure to
deploy the airbag first in accordance with the procedure
described below. If any abnormality occurs with airbag
deployment, contact the SERVICE DEPT. of the TOYOTA
MOTOR SALES, ...
DTC check / clear
1. CHECK DTC (USING INTELLIGENT TESTER)
Checking DTCs.
Connect the intelligent tester to the DLC3.
Turn the ignition switch ON.
Read DTCs by following the prompts on the
tester screen.
HINT:
Refer to the intelligent tester operator's manual
for further details.
2. CLEAR DTC ...
Slip Indicator Light Remains ON
DESCRIPTION
The skid control ECU is connected to the combination meter via CAN and
multiplex communications.
The SLIP indicator blinks during VSC and/or TRAC operation.
When the system fails, the SLIP indicator comes on to warn the driver.
WIRING DIAGRAM
INSPECTION PROCEDURE
NOTICE:
...
