Toyota Sienna Service Manual: Video terminal
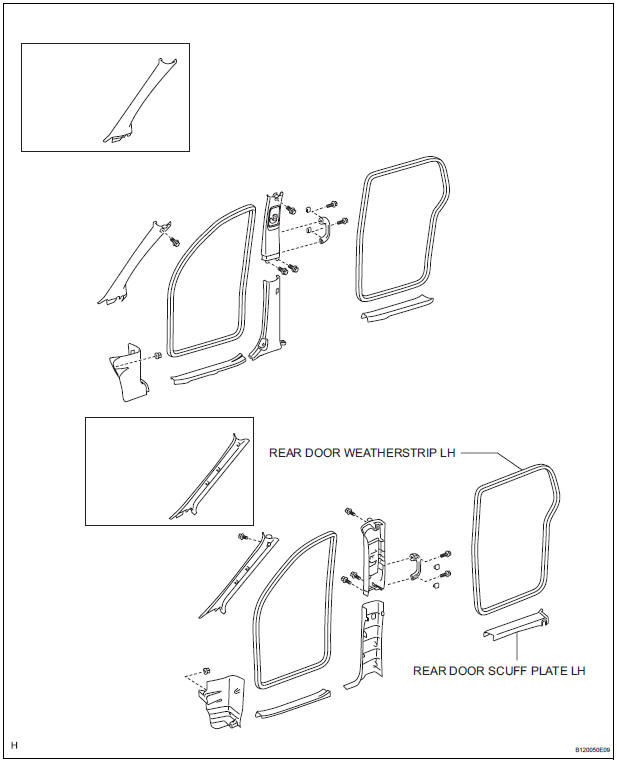
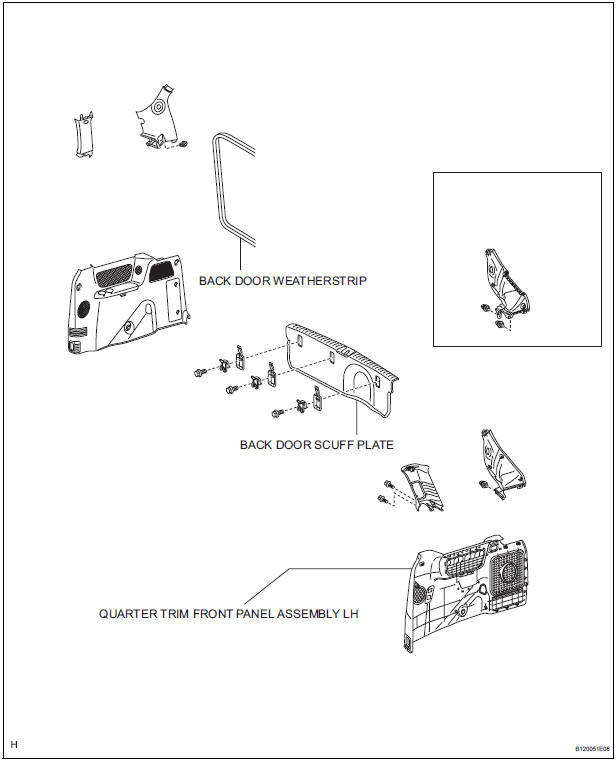
COMPONENTS
REMOVAL
1. REMOVE REAR DOOR SCUFF PLATE LH
2. REMOVE REAR DOOR WEATHERSTRIP LH
3. REMOVE BACK DOOR WEATHERSTRIP
4. REMOVE BACK DOOR SCUFF PLATE
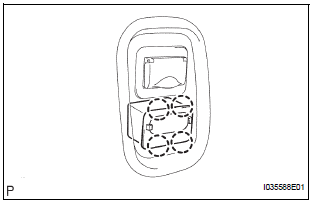
5. REMOVE QUARTER TRIM FRONT PANEL ASSEMBLY LH
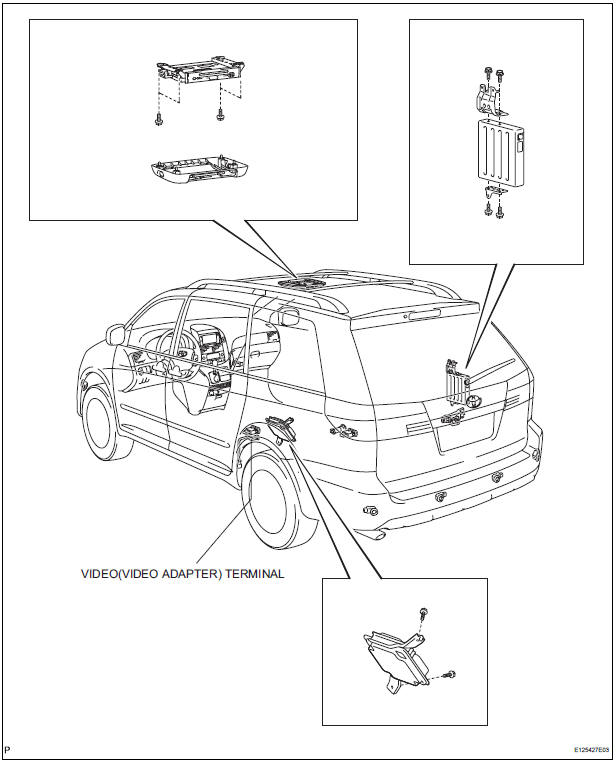
6. REMOVE VIDEO(VIDEO ADAPTER) TERMINAL
- Release the 4 claw fittings and remove the video (video adapter) terminal.
INSTALLATION
1. INSTALL VIDEO(VIDEO ADAPTER) TERMINAL
- Engage the 4 claws to install the video (video adapter) terminal.
2. INSTALL QUARTER TRIM FRONT PANEL ASSEMBLY LH
3. INSTALL BACK DOOR SCUFF PLATE
4. INSTALL BACK DOOR WEATHERSTRIP
5. INSTALL REAR DOOR WEATHERSTRIP LH
6. INSTALL REAR DOOR SCUFF PLATE LH
 Inspection
1. INSPECT INVERTER MAIN SWITCH
Inspect the continuity between terminal at the each
switch position shown in the chart.
If continuity is not as specified, replace the main
swit ...
 Audio terminal
COMPONENTS
REMOVAL
1. REMOVE INSTRUMENT CLUSTER CENTER NO. 2 FINISH PANEL
Using a moulding remover, disengage the 3 clips.
Disconnect the connector and remove the
instrumen ...
Other materials:
Data list / active test
1. DATA LIST
HINT:
By the DATA LIST displayed by the intelligent tester, you
can read the value of the switch, sensor, actuator and so
on without removing any part. Reading the DATA LIST
as the first step in troubleshooting is one of the methods
to shorten the labor time.
Connect the ...
Parking Brake Switch Circuit
DESCRIPTION
This circuit is from the parking brake switch to the radio and navigation
assembly.
WIRING DIAGRAM
INSPECTION PROCEDURE
1 CHECK BRAKE WARNING LIGHT
Check that the brake warning light comes on when the
parking brake is applied and goes off when it is released.
OK:
The ...
Oxygen (A/F) Sensor Signal Stuck
HINT:
Although the DTC titles say oxygen sensor, these DTCs relate to the
Air-Fuel Ratio (A/F) sensor.
Sensor 1 refers to the sensor mounted in front of the Three-Way
Catalytic Converter (TWC) and
located near the engine assembly.
DESCRIPTION
The A/F sensor generates a voltage* ...
