Toyota Sienna Service Manual: CD cannot be Inserted / Played or CD is Ejected Right After Insertion
INSPECTION PROCEDURE
1 CHECK IF A PROPER CD IS INSERTED
- Make sure that the CD is an audio CD or a CD with an MP3 or WMA file, and that it is not deformed, flawed, stained, burred, or otherwise defective.
OK: Normal CD
HINT:
- Translucent or uniquely-shaped CDs cannot be played.
- Commercial audio CDs can be played.
- CD-DA files on CD-ROMs, CD-Rs, and CD-RWs can be played.
- MP3 and WMA files on CD-ROMs, CD-Rs and CDRWs can be played.
- For details on playable CDs, refer to the Owner's Manual
2 CHECK THAT CD IS INSERTED PROPERLY
- Check whether or not the CD is inserted upside down.
OK: CD is properly inserted
3 CHECK CD
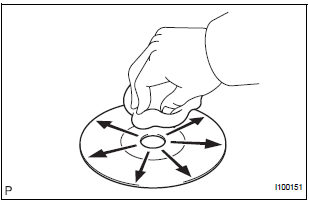
- Clean the disc by wiping it with a soft cloth from the inside to the outside in a radial direction.
OK: Malfunction disappears.
NOTICE: Do not use a conventional record cleaner or antistatic preservative.
4 REPLACE CD WITH ANOTHER AND RECHECK
- Replace the CD with a normal one and check that the malfunction disappears.
OK: Malfunction disappears
CD IS FAULTY
 CD cannot be Ejected
INSPECTION PROCEDURE
1 CHECK OPERATION
Press the disc eject switch of the radio receiver for 5
seconds or more and check that the CD is ejected.
OK:
CD is ejected
2 REPLACE CD WITH ANOTHER ...
 CD Sound Skips
INSPECTION PROCEDURE
1 CHECK CD
Check the CD.
OK:
The CD is clean.
HINT:
If dirt is on the CD surface, wipe it clean with a soft cloth
from the inside to the outside in a radial directio ...
Other materials:
Customer problem analysis
HINT:
In troubleshooting, confirm that the problem symptoms
have been accurately identified. Preconceptions should be
discarded in order to make an accurate judgment. To
clearly understand what the problem symptoms are, it is
extremely important to ask the customer about the
problem an ...
Screen Flicker or Color Distortion
INSPECTION PROCEDURE
1 CHECK DISPLAY SETTING
Enter the display adjustment screen by pressing the
"DISPLAY" switch.
Reset display settings (contrast, brightness) and check
that the screen appears normal
Press the "INFO" switch and then select "S ...
Panel Switches do not Function
INSPECTION PROCEDURE
1 CHECK PANEL SWITCH
Check for foreign matter around the switches that might
prevent operation.
OK:
No foreign matter is found
2 CHECK PANEL SWITCH (DISPLAY CHECK MODE)
Enter the "Display Check" mode (Panel Switch Check).
Operate the abnorma ...
