Toyota Sienna Service Manual: Inspection
1. INSPECT BRAKE DRUM INSIDE DIAMETER
(a) Using a brake drum gauge or equivalent, measure the inside diameter of the drum.
Standard inside diameter: 254.0 mm (10.00 in.) Maximum inside diameter: 256.0 mm (10.08 in.)
2. INSPECT REAR DRUM BRAKE SHOE LINING THICKNESS

(a) Using a ruler, measure the thickness of the shoe lining.
Standard thickness: 5.0 mm (0.197 in.) Minimum thickness: 1.0 mm (0.039 in.)
HINT: If the lining thickness is at the minimum thickness or less, or if there is severe, uneven wear, replace the brake shoe.
3. INSPECT BRAKE DRUM AND REAR DRUM BRAKE SHOE LINING FOR PROPER CONTACT
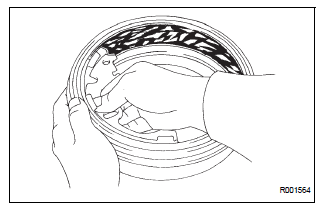
(a) Apply chalk to the inside surface of the drum, then grind drum on the brake shoe lining to fit.
HINT: If the contact between the drum and the shoe lining is improper, repair it using a brake shoe grinder or replace the brake shoe assembly.
4. INSPECT BRAKE WHEEL CYLINDER
(a) Check the cylinder bore and piston for rust or scoring.
 Disassembly
1. Remove rear wheel
2. Drain brake fluid
Notice:
wash the brake fluid off immediately if it attaches to
any painted surface.
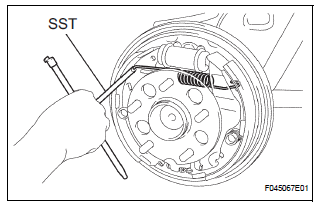
3. REMOVE REAR BRAKE DRUM SUB-ASSEMBLY
(a) Release the parking brake ...
 Reassembly
1. INSTALL REAR WHEEL CYLINDER CUP KIT
(a) Temporarily tighten the bleeder plug to the wheel
cylinder, and install the bleeder plug cap.
(b) Apply lithium soap base glycol grease to the 2 new ...
Other materials:
Subscription
After you have signed the Telematics Subscription Service Agreement
and are enrolled, you can begin receiving services.
A variety of subscription terms is available for purchase. Contact your
Toyota dealer, or push the “SOS” button in your
vehicle for further subscription details.
Safety ...
Cruise Main Indicator Light Circuit
DESCRIPTION
When the cruise control main switch is on, the CRUISE main indicator light
and READY indicator light
come on. This indicates the control condition (presence or absence of a vehicle
in front, vehicle-to-vehicle
distance, and set vehicle speed) and fail-safe state through the multip ...
Reassembly
1. INSTALL LH REAR BUMPER SIDE RETAINER
Install the LH rear bumper side retainer with the 3
screws.
2. INSTALL RH REAR BUMPER SIDE RETAINER
Install the RH rear bumper side retainer with the 3
screws.
3. INSTALL REAR BUMPER REINFORCEMENT SUBASSEMBLY
Install the rear bumper reinf ...
