Toyota Sienna Service Manual: CD Sound Skips
INSPECTION PROCEDURE
1 CHECK CD
- Check the CD.
OK: The CD is clean.
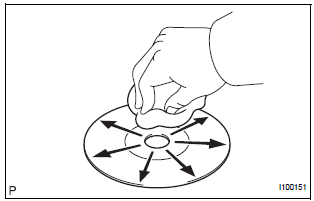
HINT: If dirt is on the CD surface, wipe it clean with a soft cloth from the inside to the outside in a radial direction.
NOTICE: Do not use a conventional record cleaner or antistatic preservative.
2 CHECK CD
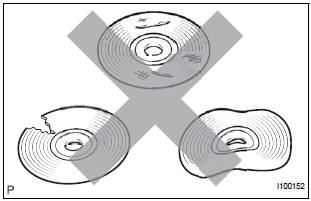
- Check that the CD is not deformed or cracked.
OK: No deformation or cracks on the CD.
3 CHECK OPERATION USING ANOTHER CD
- Check using another CD.
- Check if the problem recurs using another CD.
OK: The problem does not occur.
4 CHECK RADIO RECEIVER
- Check the radio receiver installation condition.
- Check that the radio receiver is properly installed.
OK: Radio receiver is properly installed.
REPLACE RADIO RECEIVER
 CD cannot be Inserted / Played or CD is Ejected Right After Insertion
INSPECTION PROCEDURE
1 CHECK IF A PROPER CD IS INSERTED
Make sure that the CD is an audio CD or a CD with an
MP3 or WMA file, and that it is not deformed, flawed,
stained, burred, or otherwis ...
 Radio Broadcast cannot be Received or Poor Reception
INSPECTION PROCEDURE
1 CHECK RADIO RECEIVER
Check the radio's automatic station search function.
Check the radio's automatic station search function
by activating it.
OK:
The ra ...
Other materials:
Precaution
NOTICE:
Because the compressor operates at high voltages, wear
electric insulated gloves and pull out the service plug to
cut the high-voltage circuit before inspection.
1. DO NOT HANDLE REFRIGERANT IN AN ENCLOSED
AREA OR NEAR AN OPEN FLAME
2. ALWAYS WEAR EYE PROTECTION
3. BE CAREFUL NOT ...
Removal
1. REMOVE REAR WINDOW SIDE GARNISH
ASSEMBLY
2. REMOVE REAR DOOR WINDOW FRAME SUBASSEMBLY
3. REMOVE SIDE TRIM BOARD COVER REAR
4. REMOVE REAR DOOR TRIM BOARD SUBASSEMBLY
5. REMOVE REAR DOOR GLASS RUN
6. REMOVE SLIDE DOOR WINDOW ASSEMBLY
7. REMOVE REAR DOOR GLASS WEATHERSTRIP
Put pro ...
Installation
1. INSTALL VENTILATION VALVE
(a) Install the ventilation valve.
(1) Apply adhesive to 2 or 3 threads.
Adhesive:
Part No. 08833-00070, Three Bond 1324 or
equivalent
(2) Install the ventilation valve.
Torque: 27 N*m (275 kgf*cm, 20 ft.*lbf)
2. CONNECT VENTILATION HOSE
(a) Connect ...
